This post may contain affiliate links. Please read our affiliate disclosure.
Learn how to make DIY Easter egg dyes without a kit or food coloring. These natural dyes are toxin-free, fun for kids, and produce beautiful eggs.
Dying Easter eggs is a tradition in our home. This year, since we’re trying hard to remove synthetic ingredients from our food and household products, I thought it would be fun to experiment with using natural ingredients to dye our Easter eggs.
Food dyes have been linked to various health problems, including behavioral issues in children, but they’re still used widely in our food products. Using natural dye to color your Easter eggs is a great alternative.
Whether you’re avoiding artificial food dyes for health reasons or you’re just looking to get creative with your kids this Easter, I’ll show you how to make toxin-free, DIY Easter egg dye without food coloring.
The Problem with Artificial Food Dyes
Food dyes are commonly used here in the United States. Unfortunately, they’ve been linked to a wide range of health problems, most notably behavioral issues in children.
Other countries have banned many food dyes, or put limits on their usage, but it seems that us Americans are pretty particular about the color of our food. Manufacturers know that certain colors help food sell better. And since synthetic food dyes are the cheapest way to achieve these vibrant colors, you can bet that they are used in just about every manufactured food product out there.
This DIY Easter egg dye is a great alternative to using synthetic food coloring!
What You’ll Need to Make DIY Easter Egg Dye
Eggs – I used a dozen
Water
Food ingredients or spices in bright colors – We tried turmeric, paprika, red onion skin, yellow onion skin, carrots, beets, spinach, blueberries, red cabbage, and raspberry zinger tea
White vinegar
Ice – To make an ice bath
Instant Pot (or a regular pot)
Glass jars
Strainer
A few pots
How to Make Hard-Boiled Eggs in the Instant Pot
The first step in using natural dye to color Easter eggs is to hard boil some eggs. I do it the easiest way I know how – in the Instant Pot! These hard-boiled eggs turn out perfect every time.
If you’ve never used your Instant Pot to hard boil eggs before, here’s a quick rundown. Of course, a regular pot works just fine too.
- Add 3 cups of water to the bottom of the Instant Pot. This is the minimum amount of liquid required for my particular sized Instant Pot. You can find this number in your Owner’s Manual.
- Put the rack in the bottom of the Instant Pot and place a dozen eggs in it. Make sure the eggs aren’t stacked on top of each other.
- Put the lid on the Instant Pot and lock it. Make sure the pressure valve is closed, hit “Pressure,” and set it for 5 minutes using the arrow buttons.
- In the meantime, prepare an ice bath by filling a bucket with cold water and ice.
- When the Instant Pot beeps to indicate that it’s done, let it do a slow release for 5 minutes. Then, release the rest of the pressure manually. Don’t forget to use a rag for this step to avoid burning your hand!
- Next, carefully remove the eggs from the Instant Pot and transfer them to the ice bath. Let them sit for 5 minutes before removing them from the ice bath.
Add that’s it! Perfect hard-boiled eggs.
How to Make Toxin-Free, Natural Dye for Easter Eggs without Food Coloring
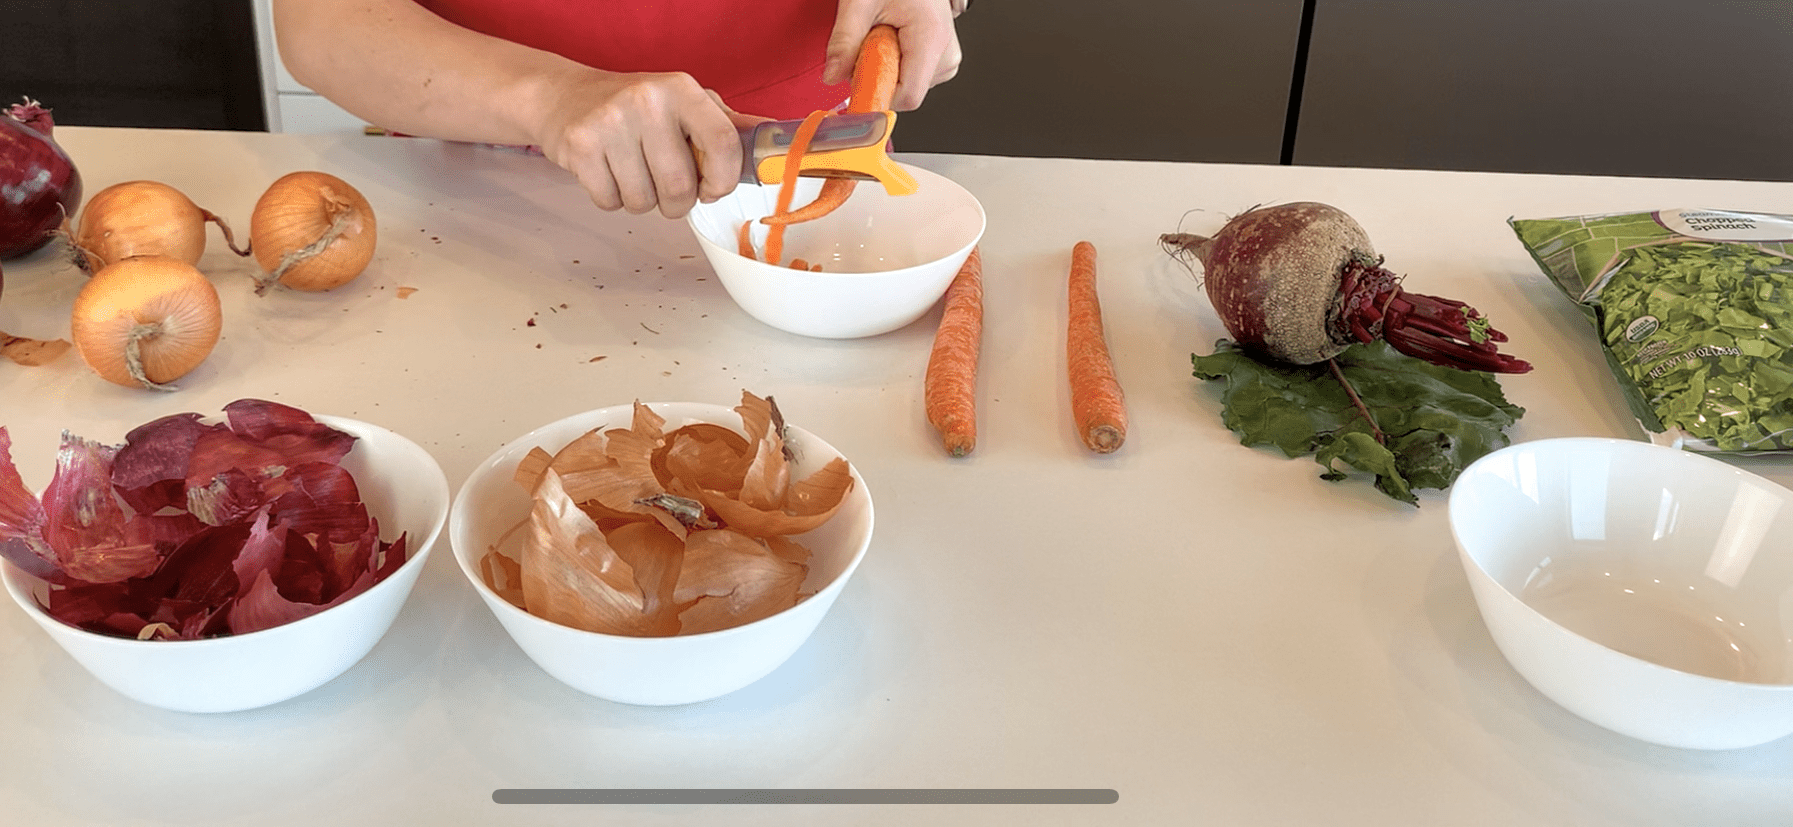
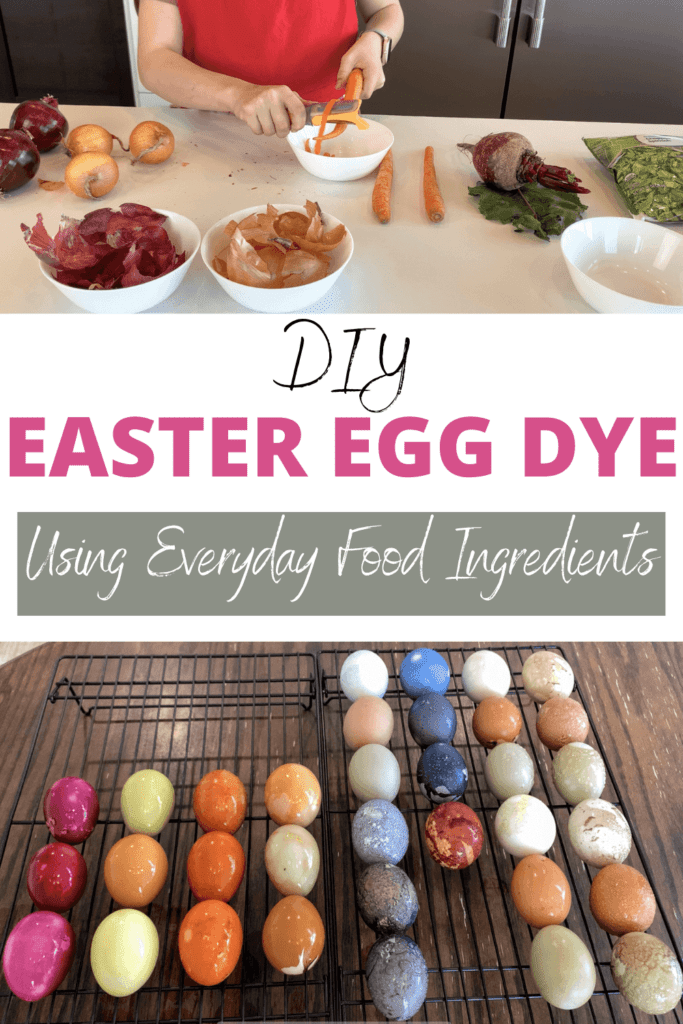
Once you’ve hardboiled your eggs, the next step is to prepare your natural dyes. I highly recommend preparing all of your ingredients ahead of time, as making the natural dyes can be somewhat time-consuming and hard to juggle – especially if you have little ones.
I tried several different items to make the natural dyes, including:
- Raspberry Zinger Tea, 4 tea bags
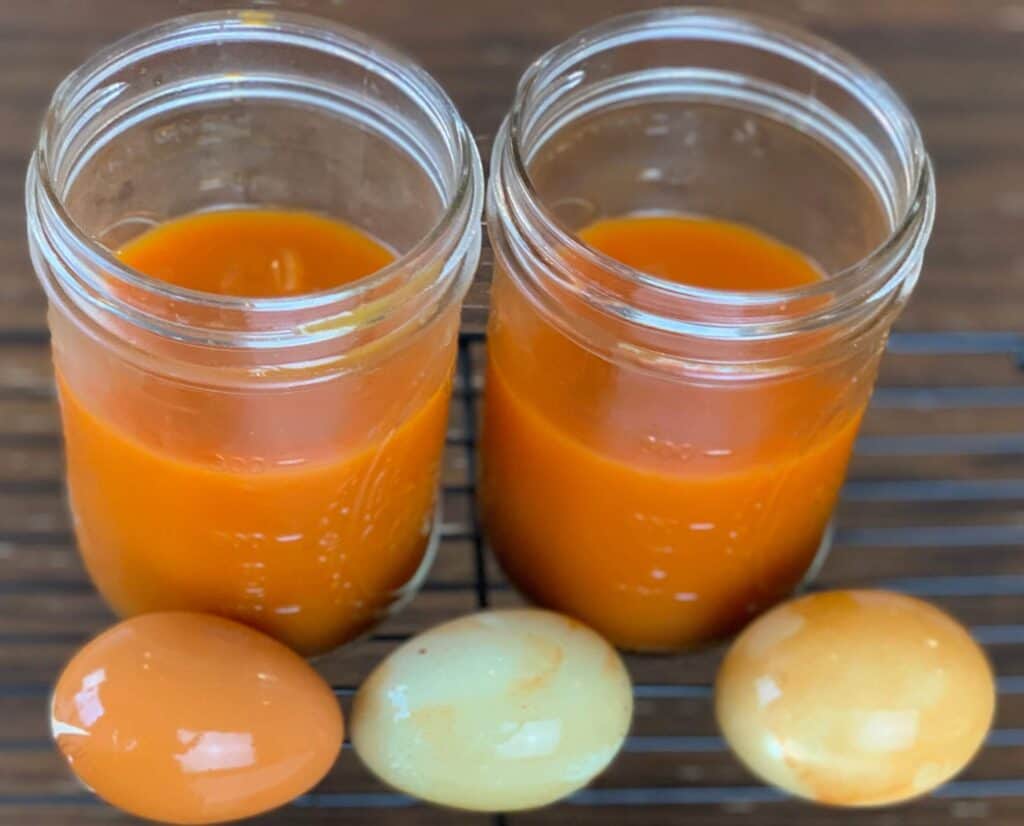
- 2 tablespoons of paprika
- 2 tablespoons of turmeric
- Papery skin of 3 red onions
- Papery skin of 3 yellow onions
- 3 carrots, peeled and shredded
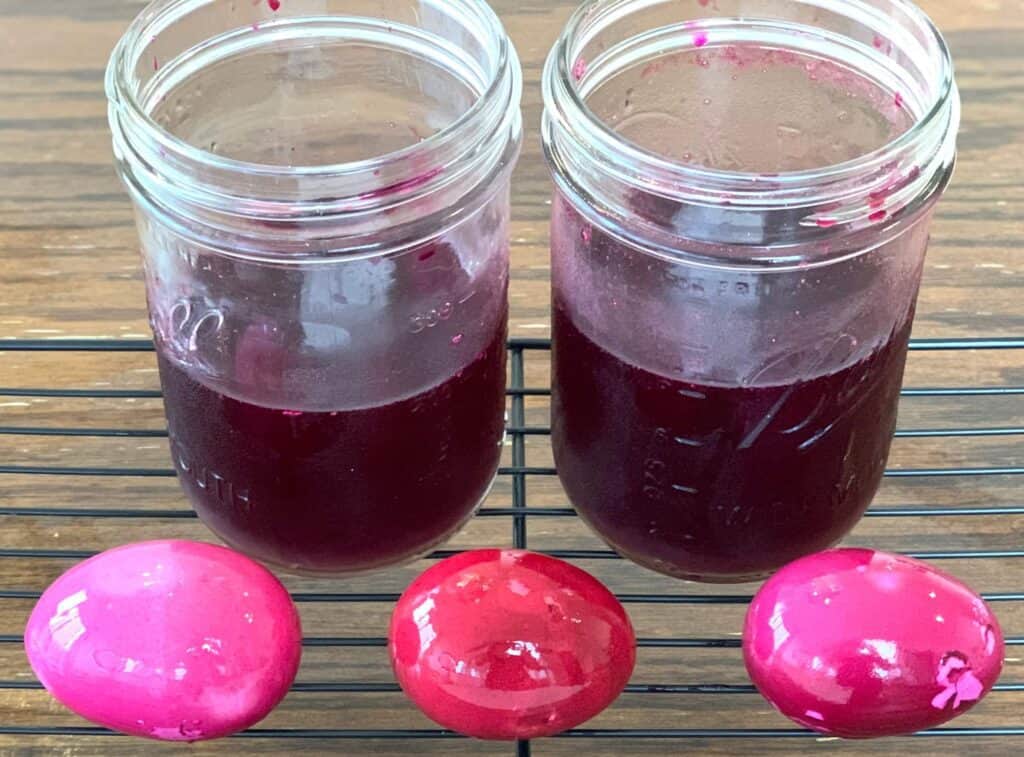
- 1 cup beets, roughly chopped
- 1 small bag of frozen spinach
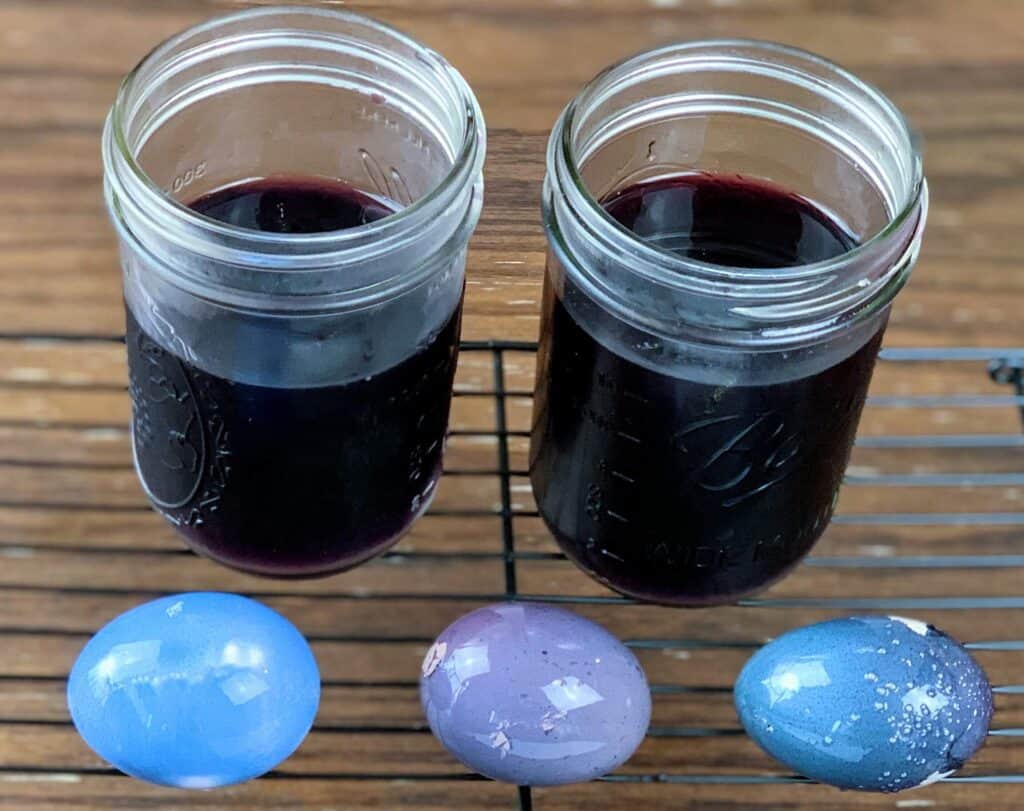
- 1 cup of blueberries
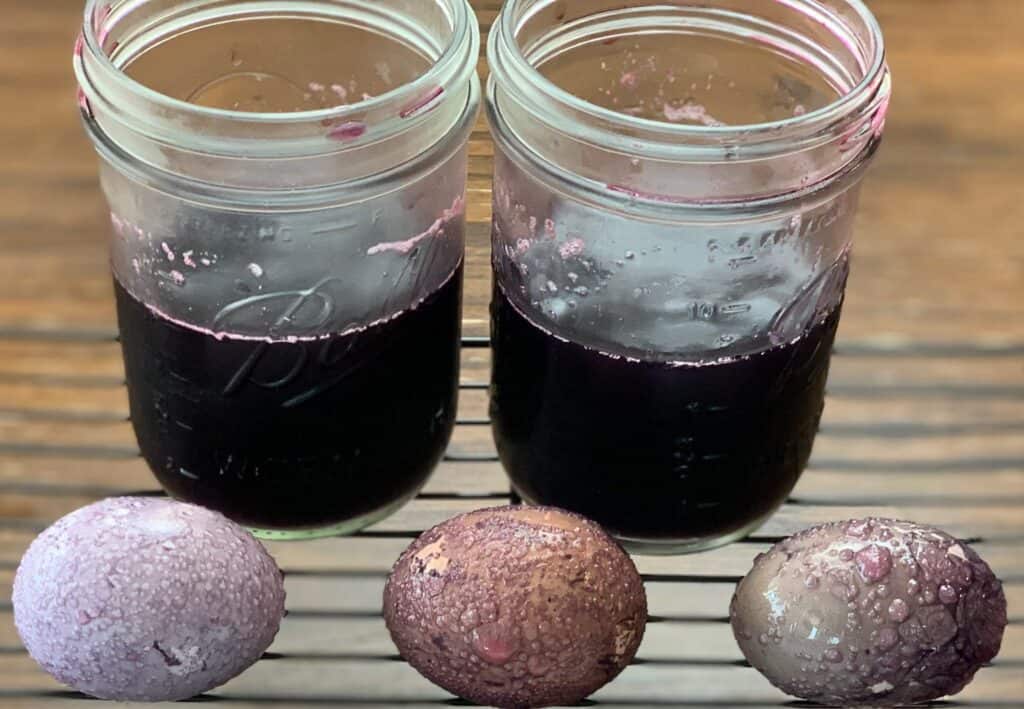
- 1 head of red cabbage, chopped
Of course, you can also try out other spices, veggies, and other sources of color you might have lying around your house to make a natural DIY Easter egg dye.
To make each dye, place water in a small pot and add one of your dye ingredients. Most of the natural dyes I tried need just 2 cups of water. However, both the cabbage and the red onion skin require 6 cups of water.
Bring the water to a boil. As soon as it begins to boil, set a timer for 20 minutes. Keep the water at a rolling boil, with the food items still in the pot, for the full 20 minutes.
When the timer goes off, remove the pot from the heat and use a strainer to transfer the dye into a glass container or jar.
Add 2 tablespoons of white vinegar for every 8 ounces of dye and stir.
Place the hardboiled eggs in the dyes. Allow the eggs to sit in the dye for a while. I have a big enough fridge that I was able to place the jars, with the eggs still in them, into the fridge overnight. Don’t worry if you can’t pull that off. You can simply leave the eggs submerged in the dyes for less time. Or, if you don’t plan on eating the eggs, you can allow them to sit out on the counter overnight to soak up as much dye as possible.
Tips for Making Natural, Toxin-Free Dyes
This was my first time making toxin-free dyes without food coloring so there was trial and error involved. Here’s what I learned along the way.
- One thing I noticed when making natural dye using the cabbage was that the color changed after reaching a boil. I changed things up for the second half of the cabbage, removing it from the heat as soon as it was just heated and was a brilliant blue color.
- In order to make all these dyes, I had several pots going at once. As one would finish, I started the next.
- Be careful when handling the turmeric water and the beet water. These two have the potential to stain just about anything they touch!
- Be sure to press down on the veggies when straining them. This ensures that all the extra liquid is released.
- Adding the vinegar is an important step in making the natural dye because it helps the dye stick to the eggs and makes the colors more vibrant. I found this to be true – except in the case of the spinach. In this case, when I added the vinegar it completely changed the color of the dye. So, I tried this one again without adding vinegar the second time around.
Results
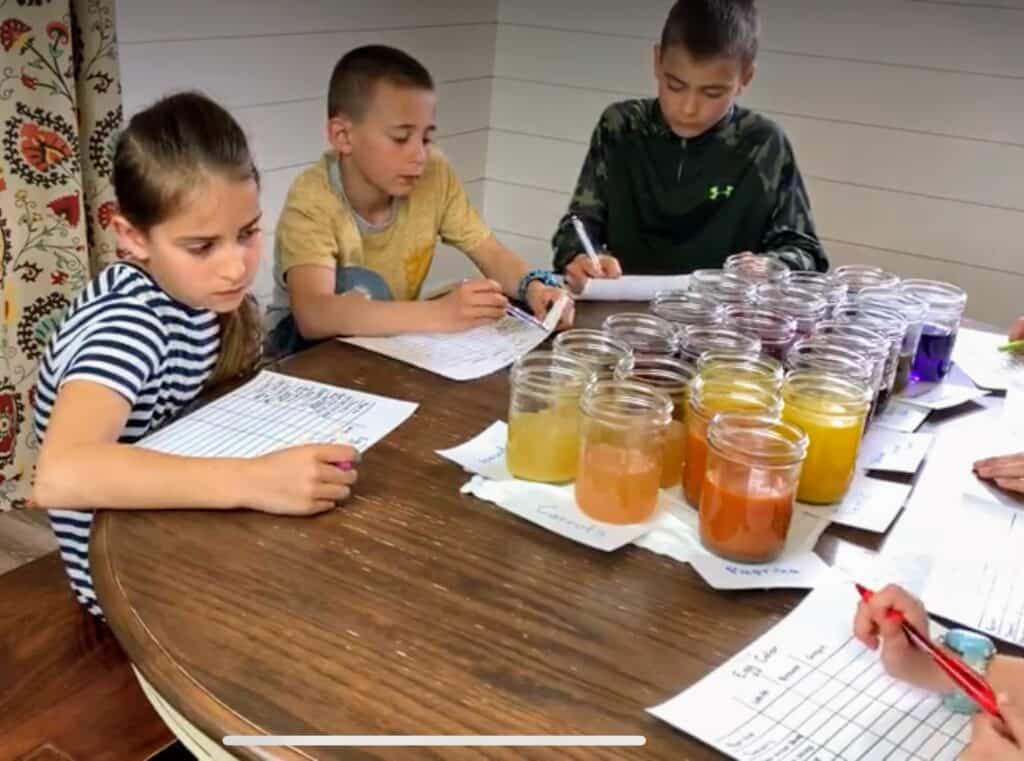
Once we made all the natural dyes, we lined them up on the kitchen table and I had my kids form a hypothesis for each color, stating what color they thought the dye would turn a white egg, a brown egg, and a green egg. We homeschool, so it was a great science experiment that all of the kids enjoyed.
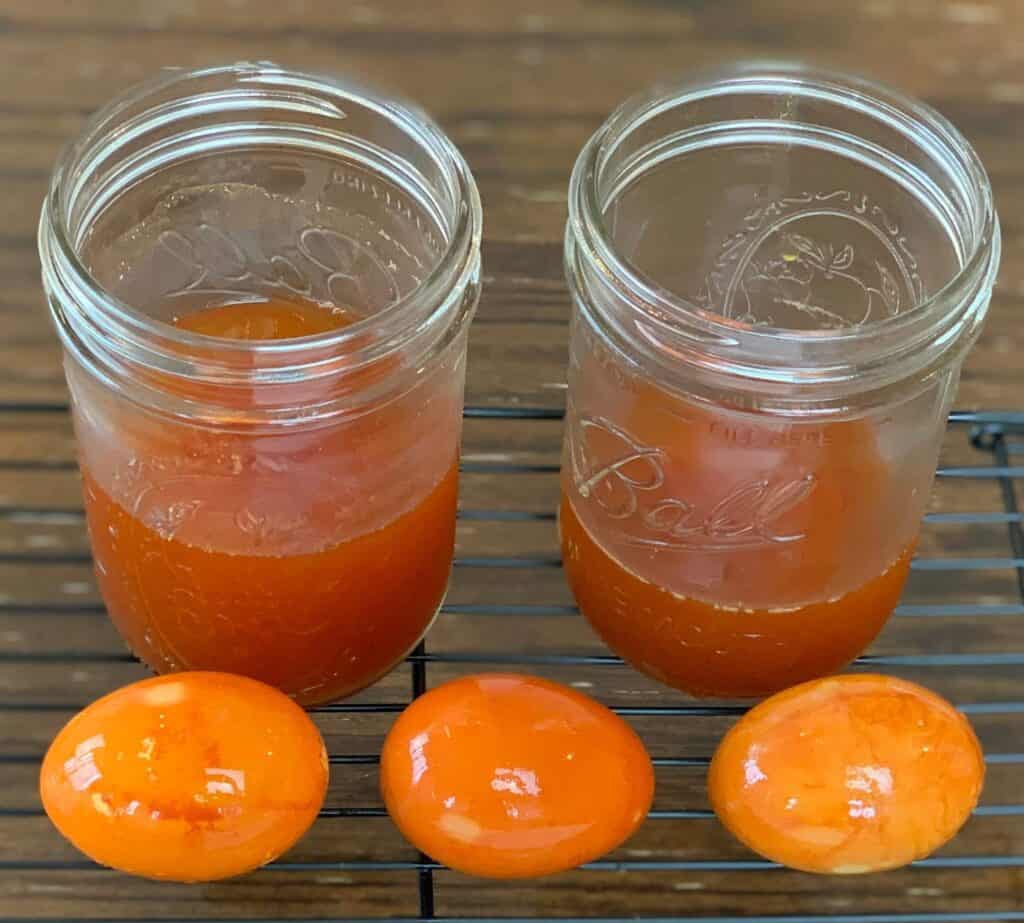
Here’s a peek at how some of the best dyes turned out once we used them on the eggs.
For full details on the process and how each dye turned out, check out the video below!
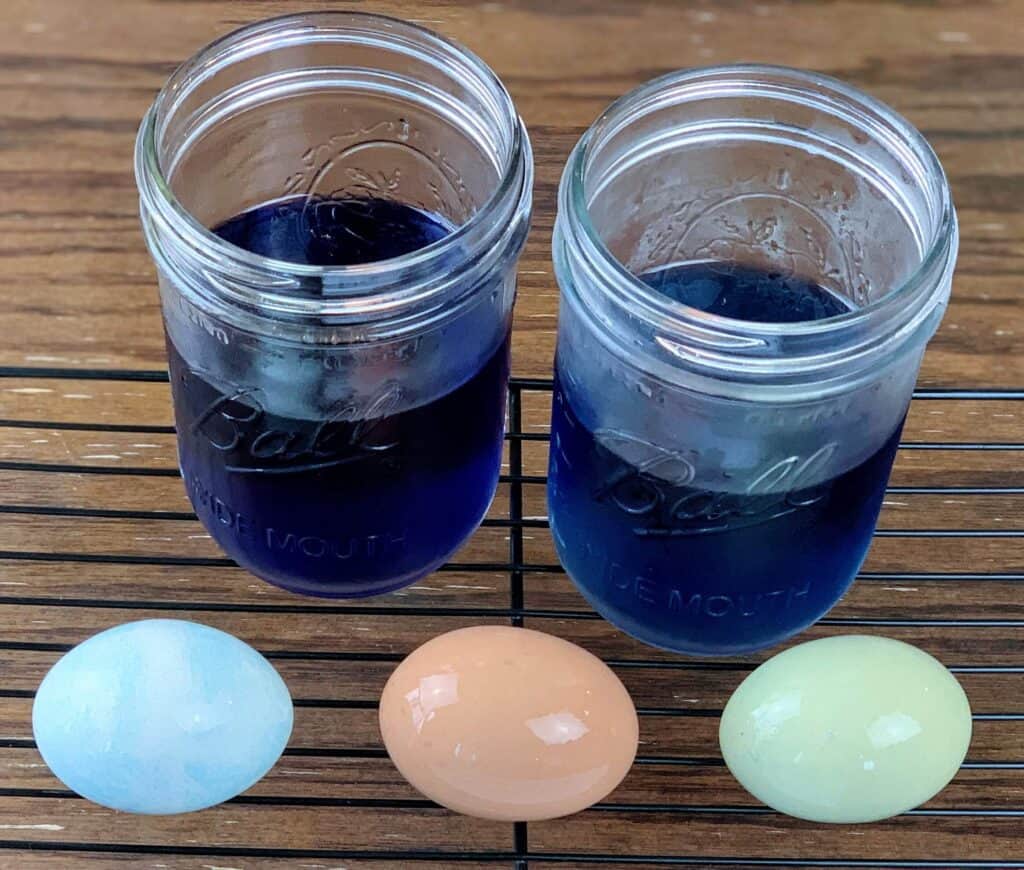
Some surprised me at how vibrant they were! Others showed little hope of dying the eggs at all.
My favorite colors on the eggs weren’t what I thought they would be…so don’t make assumptions until you finish the process!
One of the biggest surprises was that the vibrant color of the dye from the blue cabbage did not equal a brighter egg color.
My favorite DIY Easter egg dyes were turmeric, beets, yellow onion skins, blueberries, and paprika. The colors were bright and cheery.
I hope this inspired you to try making toxin-free, natural dye yourself!