This post may contain affiliate links. Please read our affiliate disclosure.
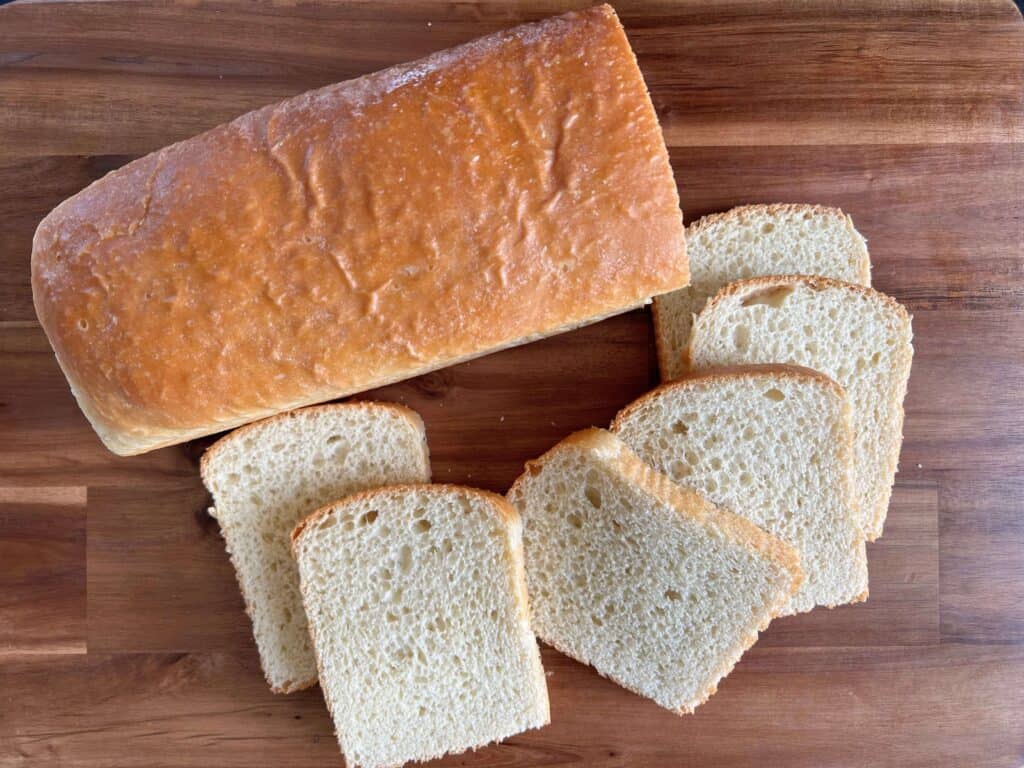
This sandwich bread recipe is not only better than storebought, with perfect taste and texture, but it is also guaranteed to be the EASIEST and most foolproof bread recipe on the internet.
While most of you know that my love for sourdough bread runs deep, you may not know that sometimes I just don’t have time to fuss with bread that needs to rise for several hours. There are days when time gets away from me and I just need some basic bread for sandwiches the next day.
To avoid racing to the store in times like these, I turn to the recipe that made me a fan of homemade bread long ago. This recipe has been tweaked and perfected over the years and is now a family favorite.
*This post contains affiliate links, which means I make a small commission at no extra cost to you. See my full disclosure here.
What you will need:
- Water
- Light tasting olive oil
- Salt
- Bread flour
- Sugar
- Instant dry yeast
How to make the easiest sandwich bread:
Here is how to make sandwich bread that is light and fluffy and perfect for sandwiches with very little effort.
I’m going to use my stand mixer, but if you don’t have one, just add the ingredients in the same order to a large bowl.
To the mixer, with your dough hook on, add 1 1/3 cup warm water, 1/3 cup olive oil, 2 teaspoons salt, 4 cups of bread flour, 2 tablespoons and 2 teaspoons sugar, and 3 teaspoons instant dry yeast. No need to mix in between or add in any unnecessary steps. Just dump these in and continue on. Easy peasy.
Turn the mixer on low and let mix until well combined. Then, kick up the speed just a notch or two and let it knead for 5 minutes.
If you are doing this without the mixer, blend it well with a wooden spoon, dump the dough onto a floured surface, and then knead by hand for 5 minutes.
Form the dough into a ball and place it in a greased bowl. Cover the bowl with a light towel and put it in a warm place. If your house is cold, try putting it in your oven with the light on. Just don’t forget it’s in there! Let the dough rise until doubled. This took about an hour for me.
Tip: If you are in a hurry, I have had success skipping this first rise and just putting the dough straight into my bread pan. The texture may end up slightly different, but in my experience, it’s hardly been noticeable.
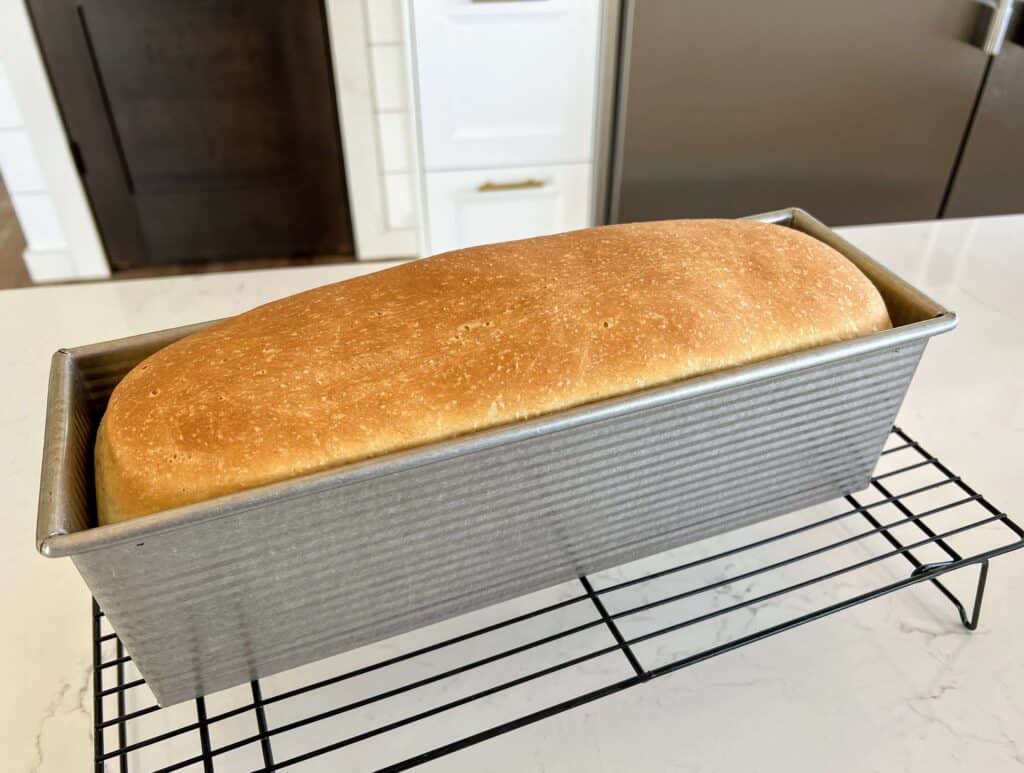
After the dough has risen, punch it down and separate the dough into 2 well-greased loaf pans, or in a large bread pan. Press it down flat into the shape of the pan.
I am obsessed with my USA Pullman bread pan. A perk of this pan is that there is no need to grease it at all!
Place your lightweight towel over the pan and let it sit until doubled in size again, which will vary depending on how warm your kitchen is, but mine took 1 hour.
Preheat your oven to 350 degrees F and then bake your bread for about 30 – 35 minutes, or until the internal temperature is 190 degrees F and the top is golden brown.
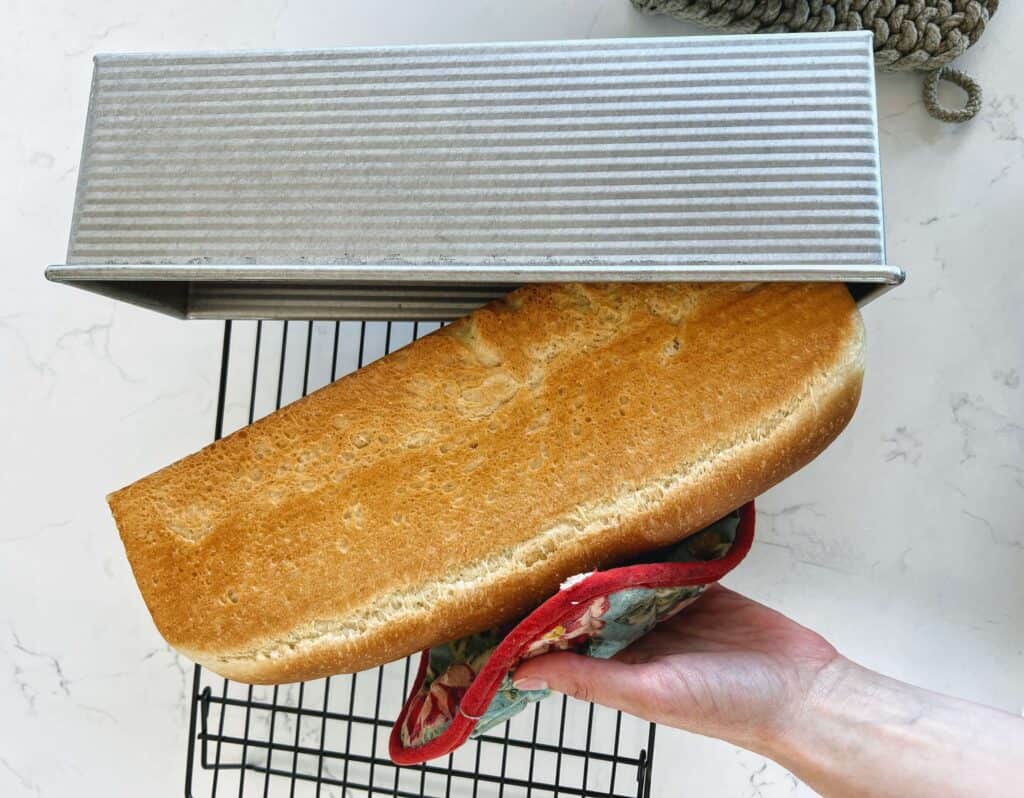
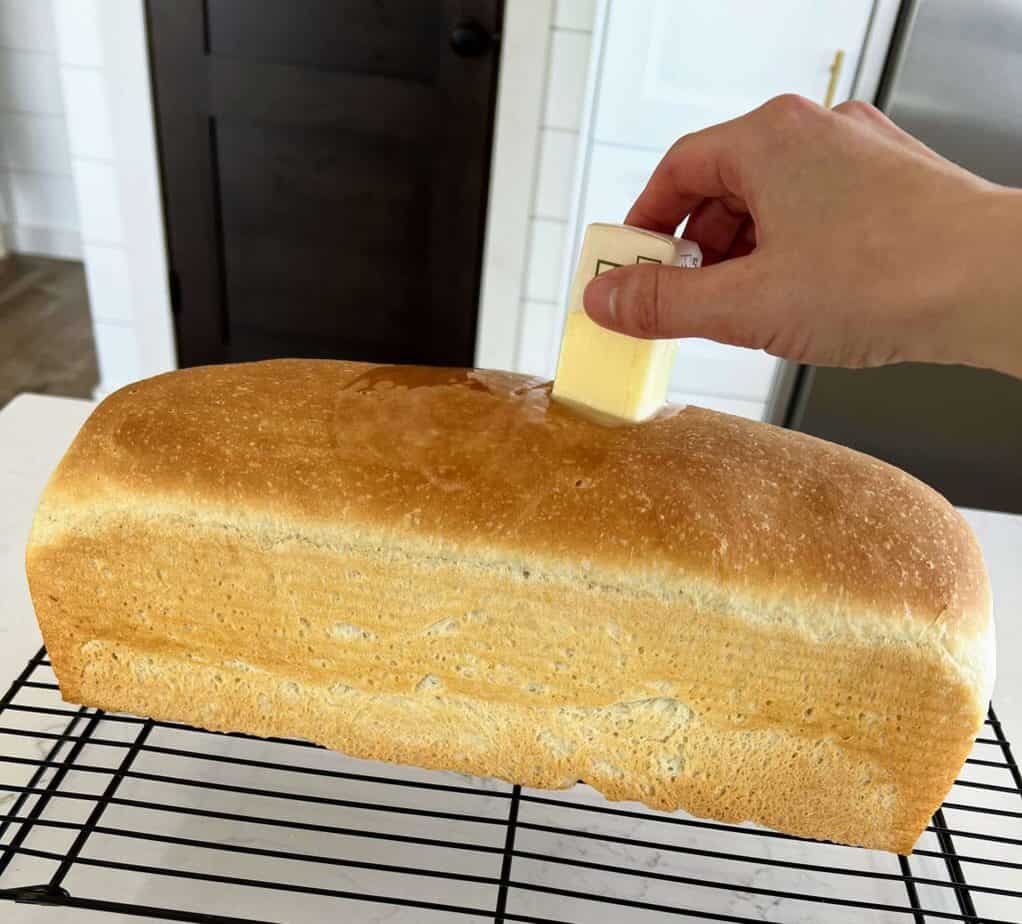
Remove the bread from the oven and immediately remove it from the pan to let cool on a cooling rack. Then, take a stick of butter and generously rub the top of the loaf.
I know you are going to want to dive right in, but letting it cool before cutting it open will result in the best texture.
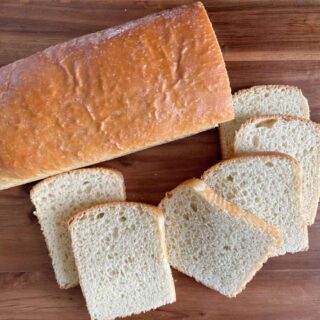
Easiest Sandwich Bread Recipe {Better than Storebought!}
Ingredients
- 1 1/3 cup warm water
- 1/3 cup light-tasting olive oil
- 2 teaspoons salt
- 4 cups bread flour
- 2 tablspoons + 2 teaspoons sugar
- 3 teaspoons active dry yeast
Instructions
- To a stand mixer with a dough hook or large bowl add the following in this order: water, olive oil, salt, bread flour, sugar, and yeast.
- Turn the mixer on low and let mix until well combined. Then, kick up the speed just a notch or two and let it knead for 5 minutes. If you are doing this without the mixer, blend well with a wooden spoon, dump onto a floured surface, and then knead by hand for 5 minutes.
- Form the dough into a ball and place it in a greased bowl. Cover with a light towel and put in a warm place. If your house is cold, try putting it in your oven with the light on. Just don’t forget it’s in there! Let the dough rise until doubled (1 – 2 hours).
- Punch it down and place the dough into 2 well-greased loaf pans, or in a large bread pan. If using a USA Pullman loaf pan, do NOT grease.
- Place a lightweight towel over the pan and let it sit until doubled in size again, which will vary depending on how warm your kitchen is, but mine took 1 hour.
- Preheat your oven to 350 degrees F and then bake your bread for about 30 – 35 minutes, or until the internal temperature is 190 degrees F and the top is golden brown.
- Remove the bread from the oven and immediately remove it from the pan to let cool on a cooling rack. Then, take a stick of butter and generously rub the top of the loaf.
- I know you are doing to want to dive right in, but letting it cool before cutting it open will result in the best texture. Enjoy!
Video
Notes
Wasn’t that easy? Now enjoy and don’t be surprised when your family says they never want storebought bread again!
So why don’t t you grease a Pullman bread pan? I have one and the direction say to grease and don’t use Pam spray.
I’m sorry, I should be more specific on that. You are not supposed to grease USA Pans pullman bread pans, but other brands may be different. Definitely follow the directions that came with your specific pan. The USA pans are nonstick (without chemicals) and greasing them would ruin that property over time.
2 questions….are you not using the lid on the pullman pan, and in one list you say Instant Yeast and in the second list you say Active Dry Yeast. Which is it??
No, for this recipe I am not using the lid because I want it to rise taller than that. Also, sorry for the confusion. It should be active dry yeast, not instant.
How do you store your bread? Can you place it in the pan with the cover?
You can definitely store your bread in the pan with the cover on! Just make sure it’s completely cooled before covering it to avoid condensation. If you’re not using the cover, wrap the bread in a clean towel or store it in an airtight container.
@thefromscatchfarmhouse – I just used instant. Hopefully it still will turn out.
Hopefully it worked out fine for you instant yeast is going to act a little differently. I would recommend active dry yeast in the future
What is the flour your using For the bread?
I usually use an organic bread flour, but all-purpose will work too.
Can I use the lid, and of do is the baking time the same?
You can, but keep in mind that it will reduce the amount that it is able to rise, so it may be slightly more dense. The baking time will be the same.
One last question…
Couldn’t I use my breadmachine to mix it and thru the first rise then 2nd rise in the pan and bake in the oven?
Hello, I have a 13x 5 loaf pan would this recipe work well in that loaf pan?
Hi! A 13×5 loaf pan should work fine for the recipe. It might make a slightly different shape or size loaf, but it should turn out great!
Do you still cut in half and use 2 loaf pans if you use 13×5? Thank you!
Yes, exactly!
Have you tried doing any Whole Wheat mixed in with the White?
Yes, you can mix whole wheat with white flour! It adds a nice flavor and a bit more nutrition. Just keep in mind that whole wheat flour absorbs more liquid, so you might need to adjust the recipe a bit.
If you say active dry yeast doesn’t it need to be proofed first? Just mixing it in with the other ingredients didn’t work for me, and yes my water was warm.
Nope, proofing is not necessary. Proofing does allow you to see if your yeast is still good and active before proceeding. My guess is that your yeast was no longer active.
How long is this bread good for? I wasn’t sure how long it would stay fresh.
It will stay good at room temperature for a few days. You can gain a few extra days by refrigerating the bread after covering it. If I’m making bread ahead of time I just cover and freeze it. It freezes great!
Does this recipe make just 1 loaf?
This makes one large (Pullman) loaf or two smaller ones.
Can you use a different oil? Like avocado or extra virgin olive oil?
Yes, you can sub avocado oil 1:1 for the olive oil!
My first loaf came out perfectly but the next two caved in on one side. Any advice on what I’m doing wrong?
When a bread loaf caves in, it usually means that it was overproofed. Try popping it in the oven a little sooner next time and it shouldn’t do that.
I made it yesterday and it came out fantastic. Perfectly brown and soft inside. I wish I could show pictures because it was beautiful and I was so proud of it! Thank you for this wonderful recipe!
Yay! Thank you so much for sharing!
Can you substitute King Arthur Gluten Free Bread Flour?
I haven’t tried it, but if you do please let me know how it goes!
Can you sub avocado oil or butter(if so, how much?) in place of the olive oil?
Yes, you can sub avocado oil 1:1 for the olive oil. Sorry for the late response!
I have made this bread three times in the large Pullman pan & it turns out great!!! Thank you for the recipe!!!!
Yay, I’m so happy to hear that you love the recipe!