This post may contain affiliate links. Please read our affiliate disclosure.
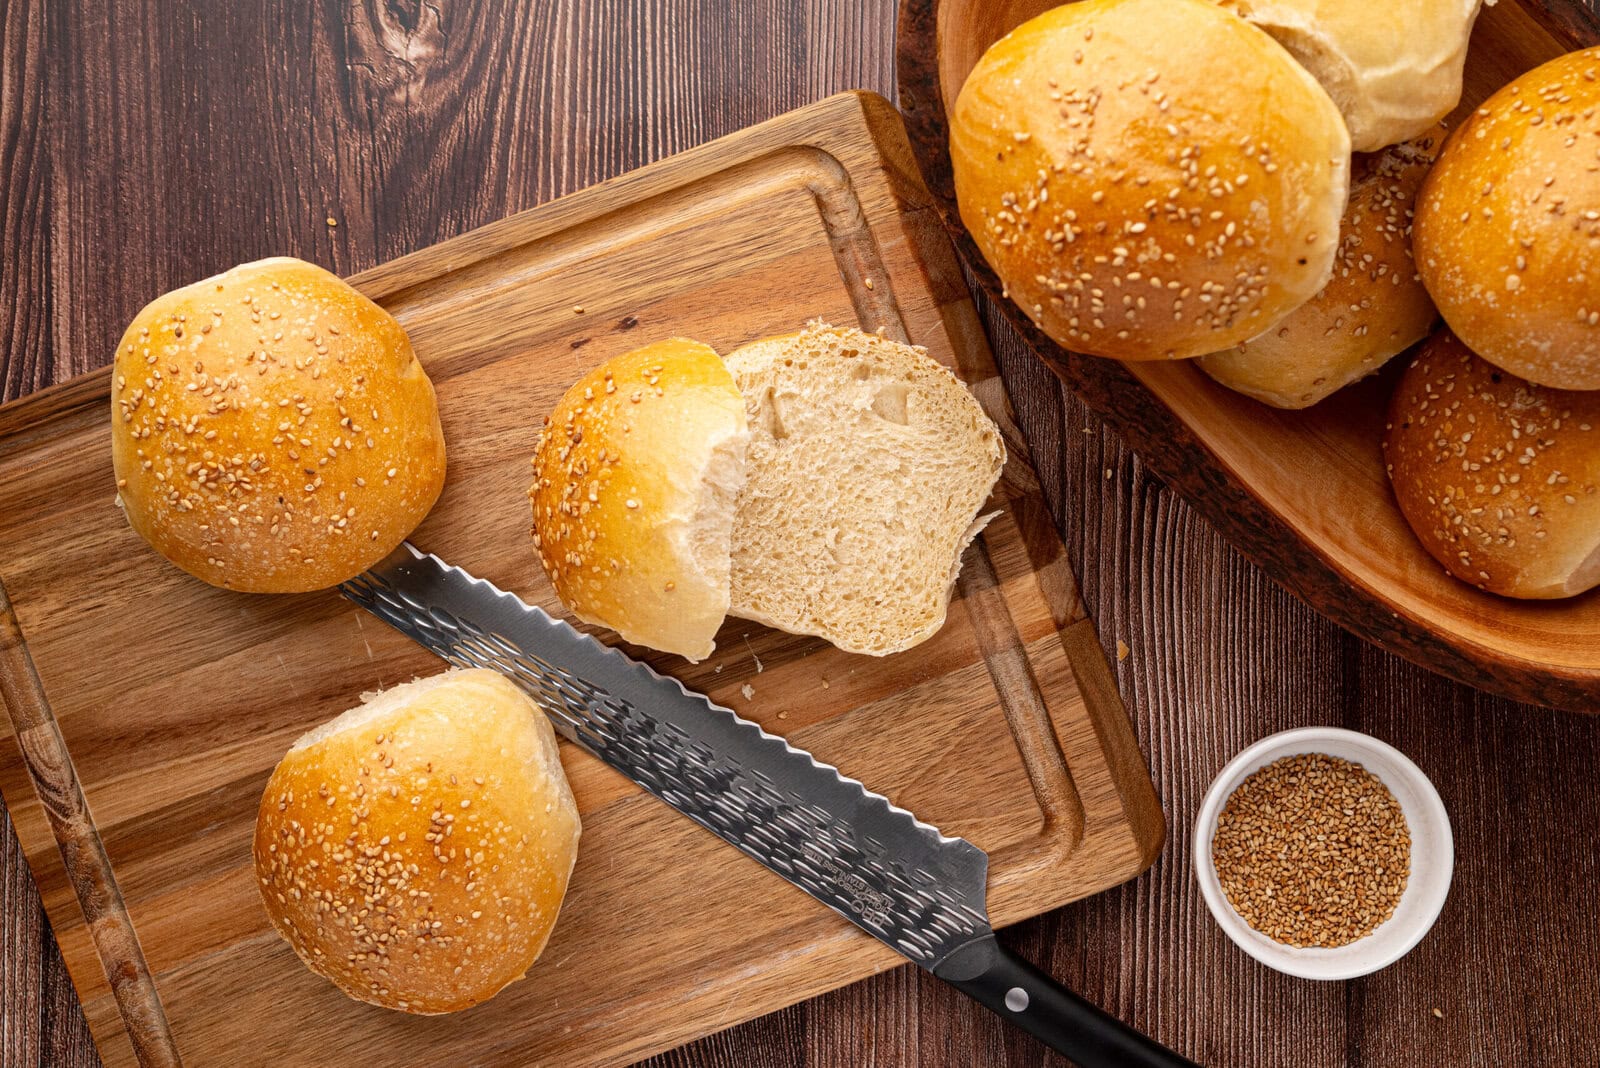
Soft yet sturdy sourdough burger buns that hold their shape with juicy fillings. These naturally leavened buns have a tender crumb, subtle tang, and are perfect for smash burgers, BBQ chicken sandwiches, burgers, or grilled veggie stacks. Start these delicious buns using all simple ingredients in the morning and bake them fresh for dinner the same day!
I’m pretty picky about my burger buns. It can be too dry, crumbly, or firm. Yet it can’t be so soft that it gets soggy or lets my burger fall apart. It also has to have a delicious flavor, but not so flavorful that it steals the show. It’s a careful balance, you see?
I’m happy to say that this sourdough burger bun recipe not only checks all of the boxes, but it also requires zero commercial yeast, just an active sourdough starter! I also love that it is a same-day recipe so that I don’t have to think too far ahead, which isn’t one of my strengths in the kitchen. I love working with my sourdough starter and have slowly transitioned to using it for things like sourdough English muffins, dinner rolls, and sourdough bread as well.
Once you have this recipe in your repertoire, you will no longer need to buy store-bought buns or yeast – double win!
Why Make Burger Buns with Sourdough vs. Commercial Yeast?
- Easier to digest – The long fermentation breaks down gluten and phytic acid.
- Better flavor – Sourdough gives the buns a rich, slightly tangy taste.
- More nutritious – Fermentation helps unlock vitamins and minerals in the flour.
- Naturally preserved – Sourdough’s acidity helps the buns stay fresh longer.
- Blood sugar friendly – Slower rise time means a lower glycemic response.
- No need for store-bought yeast – Great for from-scratch baking and reduces your reliance on the grocery store.
Tips for Making Sourdough Burger Buns
- Use an active, bubbly starter – Make sure your sourdough starter is at peak strength for the best rise.
- Keep a close eye on your proofing time – I think this is the hardest part about baking any bread, but especially sourdough with its unpredictable rise time. Don’t worry, you will get the hang of it, but you may need to peek at it a little more often the first few times. See my notes in the instructions below for how to perform the “poke test” to see if your buns have risen enough
- Weigh your ingredients – For consistent results, use a kitchen scale instead of measuring cups.
- Control your dough temperature – Aim for a dough temp around 75–78°F for best fermentation.
- Shape tightly – Form smooth, round buns with a taut surface to help them rise evenly.
- Cover during the second rise – Prevent drying out by covering buns with a damp towel or plastic wrap.
- Bake with steam – A tray of water in the oven during the first 10 minutes helps create soft buns with a nice crust.
- Let them cool before slicing – This helps set the crumb and keeps the buns from getting gummy.
Sample Baking Schedule
The Night Before
8:00 PM: Feed your sourdough starter.
The next morning
8:00 AM: Mix the dough and let rest for 30 minutes.
8:30 AM: Do a set of stretch and folds.
9:00 AM: Do a second set of stretch and folds.
9:30 AM: Do a third set of stretch and folds. Cover and let rest until the dough has almost doubled in size (ideally at 70-75 degrees F)
2:00 PM: Divide and shape the dough. Cover and let rest until puffy.
5:00 PM: Brush dough with an egg-wash, sprinkle sesame seeds and bake.
How to Have Sourdough Buns Ready Early in the Day
The sample schedule and instructions lead you to bake your buns around dinner time. If these need to be done in the morning or afternoon, simply make them the night before and let them do their final proof in the fridge overnight. The cold fridge slows down the fermentation process. Let them come to room temperature for 1 hour before baking the next day.
Another option is to just do the bulk ferment in the fridge overnight, remove, and let rise until almost doubled, and then continue with the normal instructions from there. This is a great option if you don’t have enough room in your fridge for the buns to be shaped on a pan.
How to Make Homemade Sourdough Burger Buns
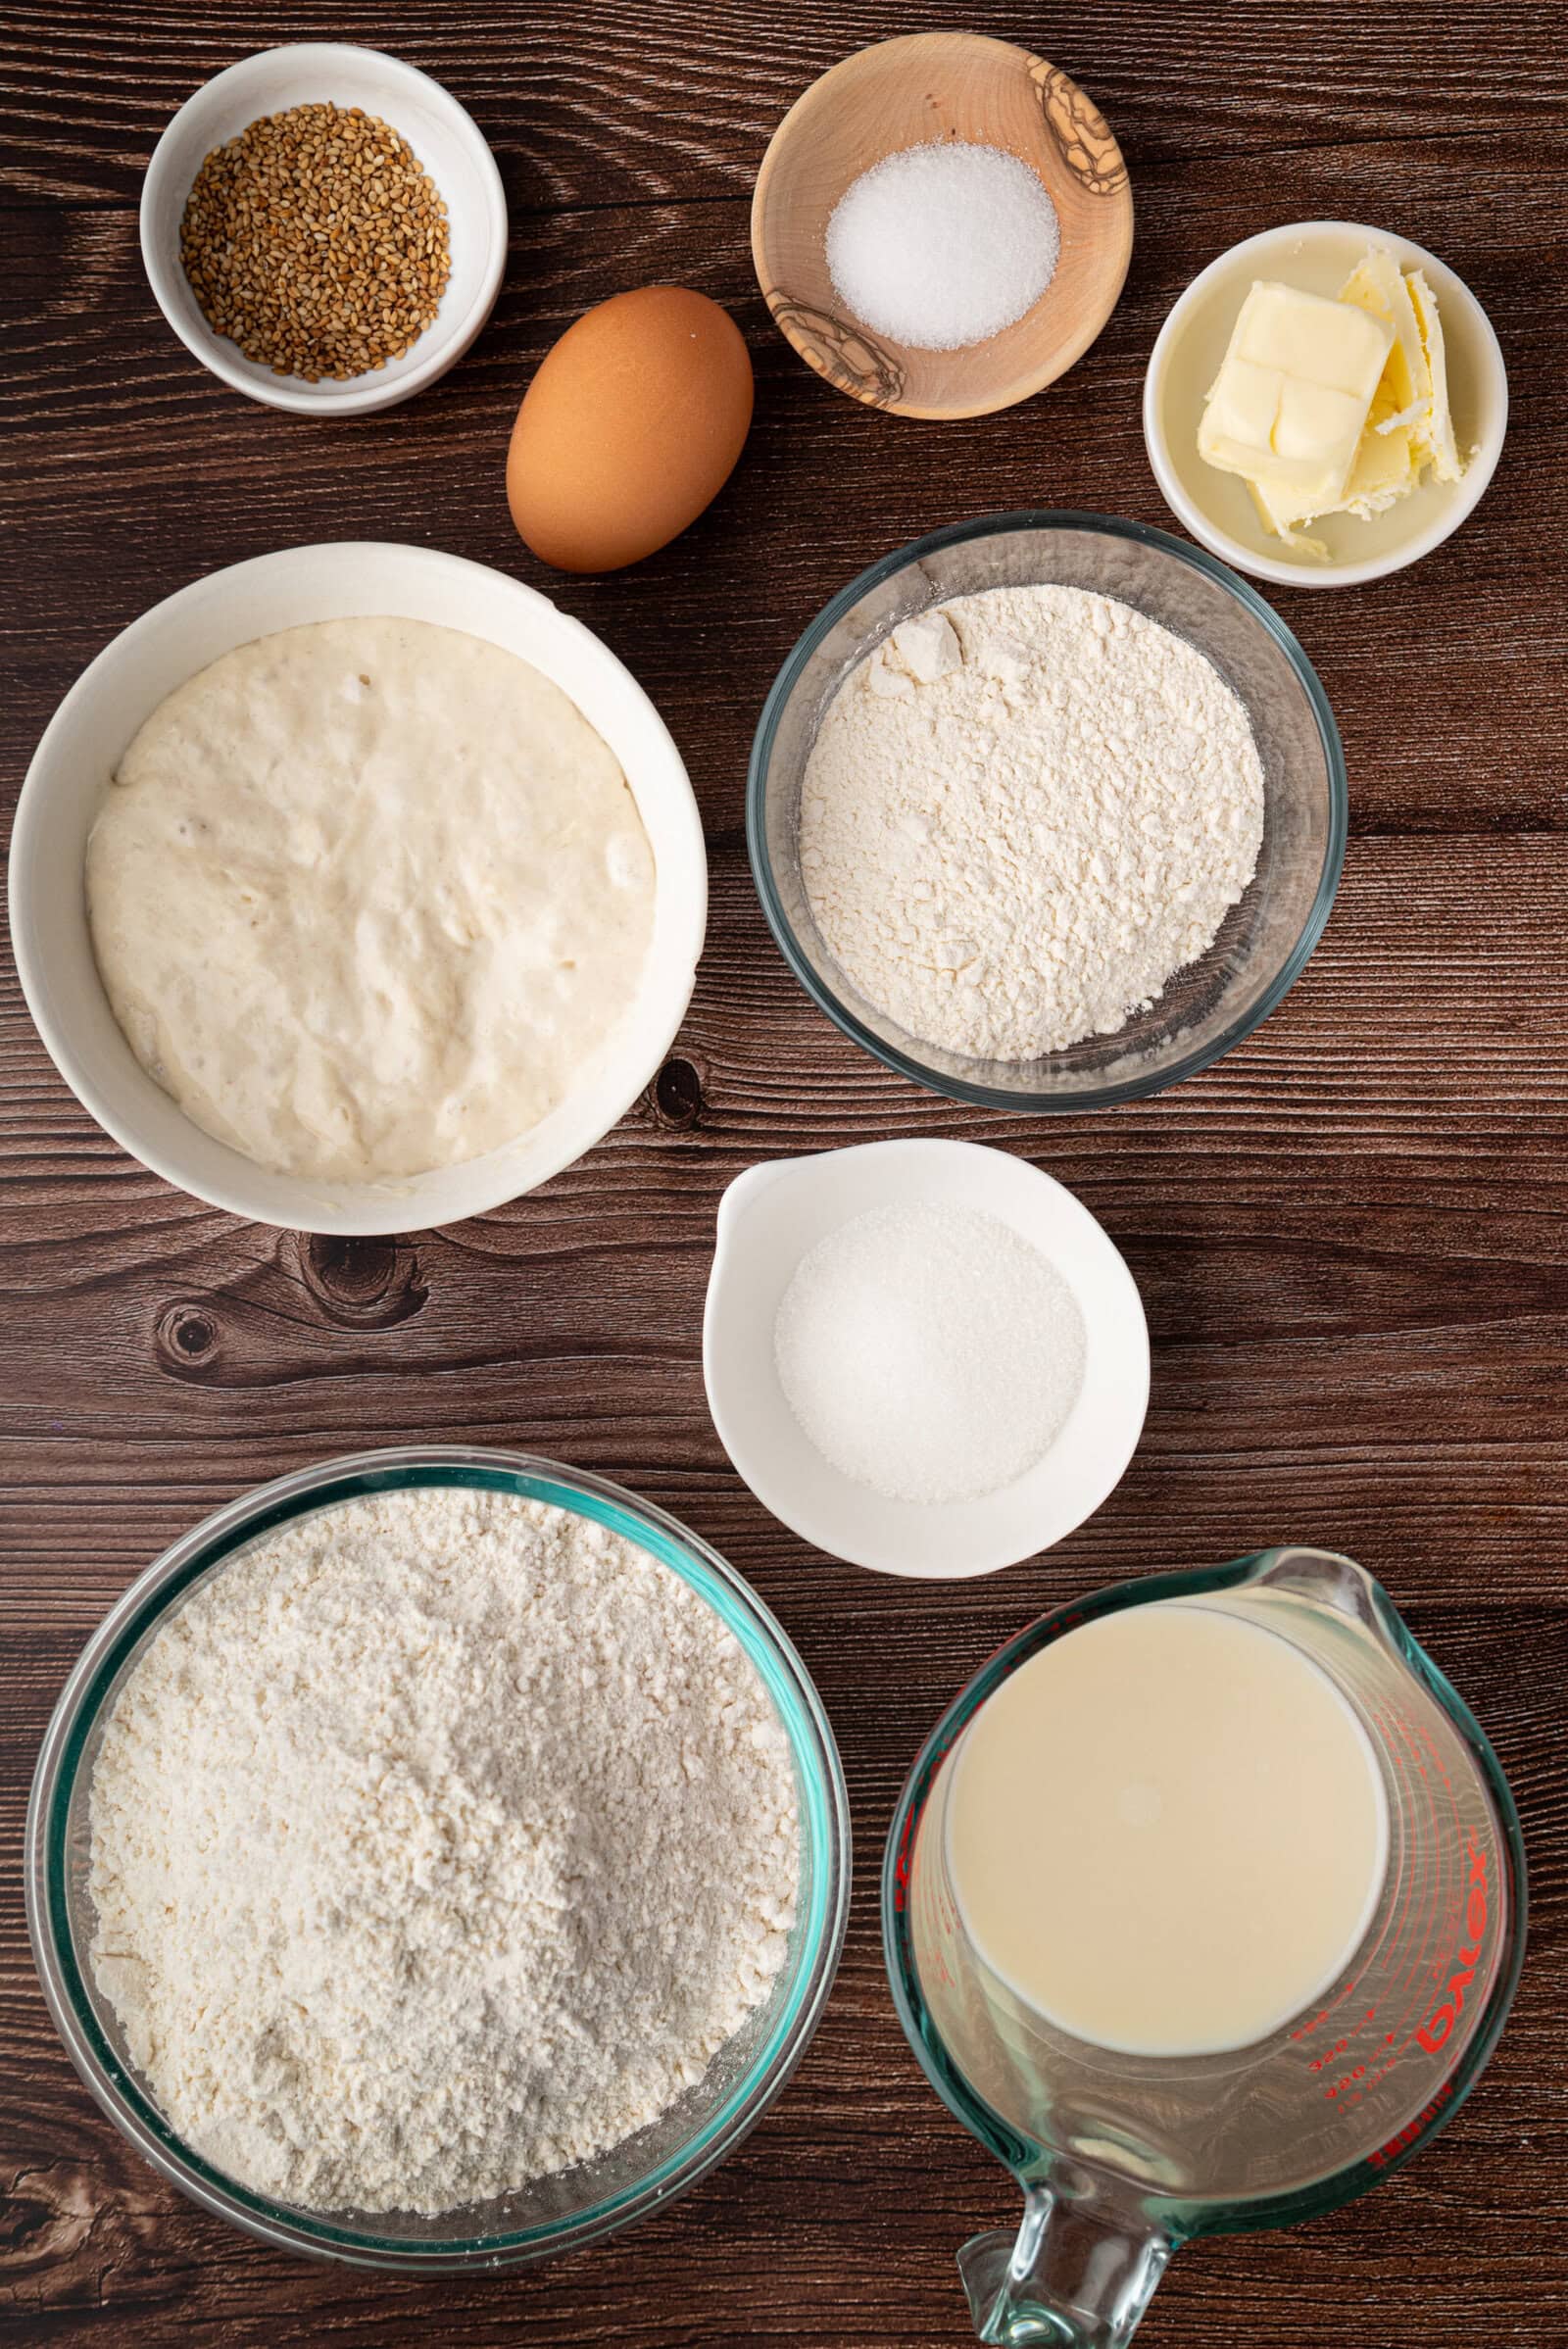
Ingredients you’ll need for this recipe:
For exact ingredient amounts, see the recipe card below.
Tools or other supplies you may need:
Step-by-step instructions
Step 1: Feed Your Starter
You want an active sourdough starter, so make sure to feed your starter the night before.
Step 2: Mix Your Dough
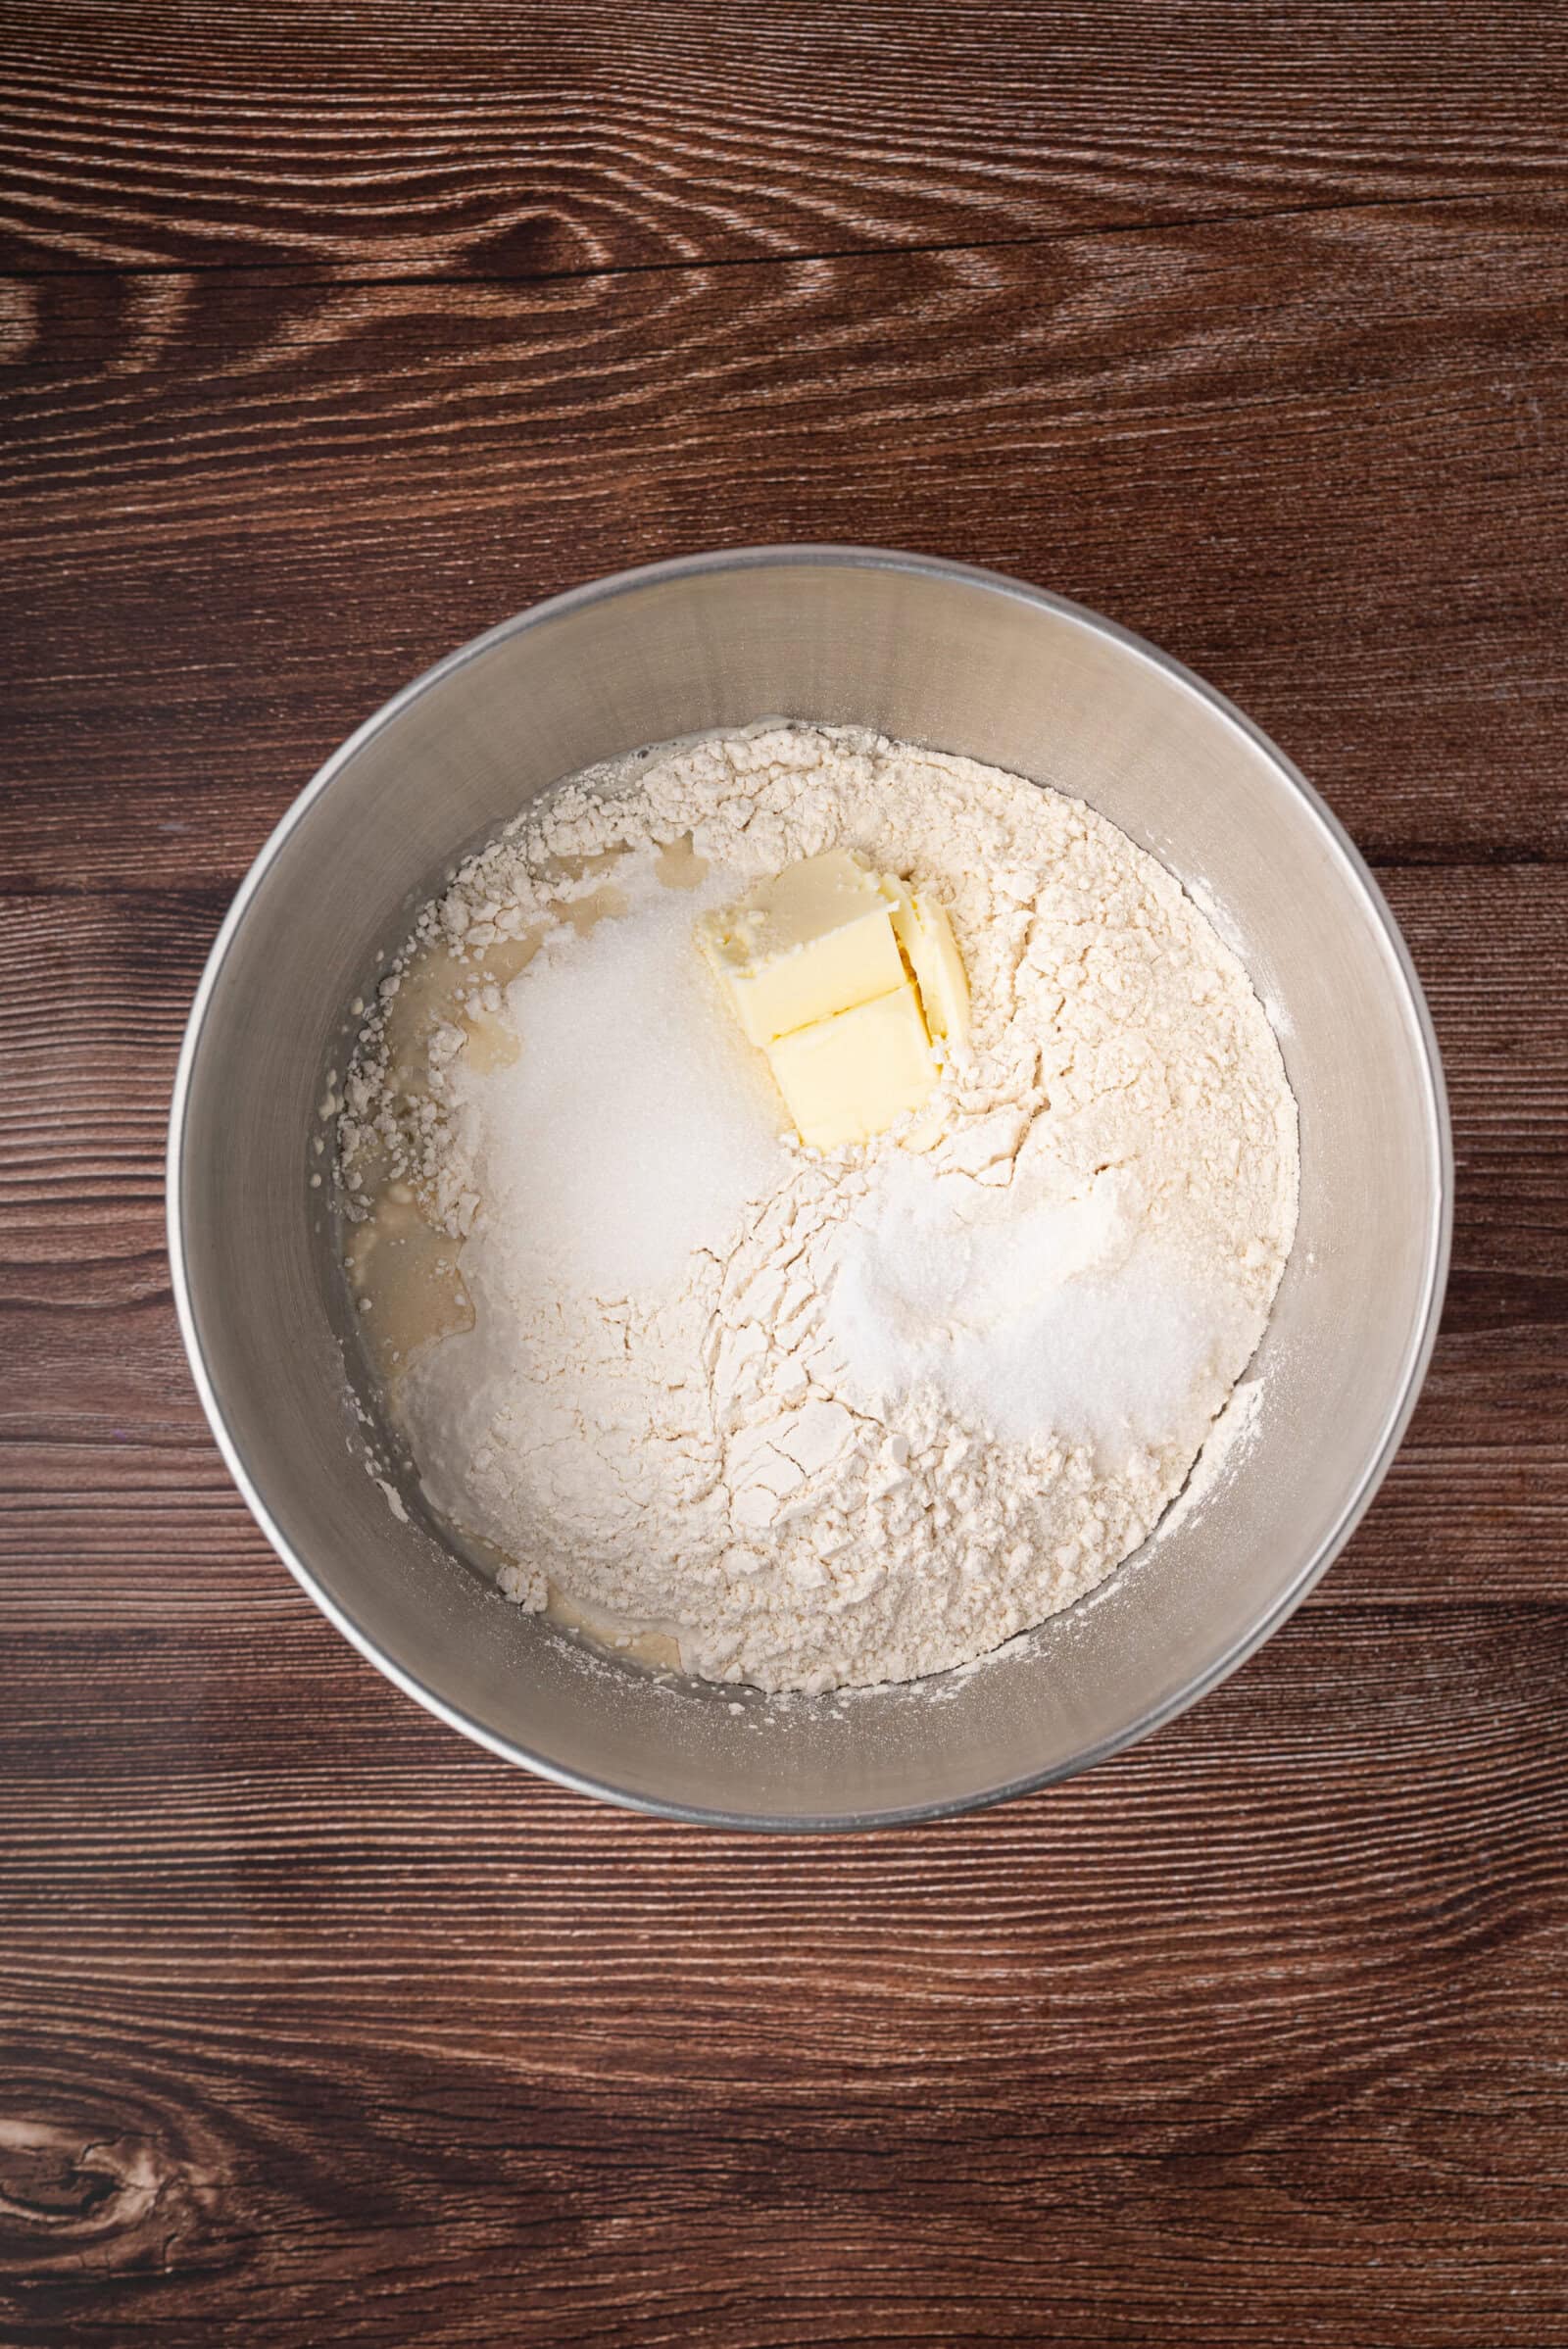
In a large bowl or the bowl of a stand mixer, combine the sourdough starter, flours, sugar, salt, milk, and softened butter. See recipe card below for exact amounts. Mix until a shaggy dough forms, then knead (by hand or mixer with the dough hook attachment) until smooth and slightly tacky, about 6–8 minutes. Add small amounts of warm water, as needed, for hydration.
I like to do this process in my stand mixer, but it can be done by hand as well.
Step 3: Stretch and Folds
Cover the dough and perform 2-3 sets of stretch and folds over the next 2 hours.
Don’t worry about exact timing here, but I usually set a timer so that I don’t forget. The first timer is generally for 30 minutes. Then, I do a set of stretch and folds. Then, I set another 30-minute timer. This process repeats until I have done 3 sets and my dough passes the “windowpane” test.
To see if your dough passes the windowpane test, take a small piece of dough and slowly stretch it. If it breaks immediately, your dough needs more stretch and folds. If it stretches to where you can see light passing through without breaking, it’s good to go.
If you are unfamiliar with stretch and folds, don’t be intimidated by this sourdough technique. All you do is grab one side of the dough ball, stretch it up, and then tuck it back in. Rotate the bowl and repeat the process all the way around the dough ball a few times. The purpose here is to build the gluten strands and strengthen the dough.
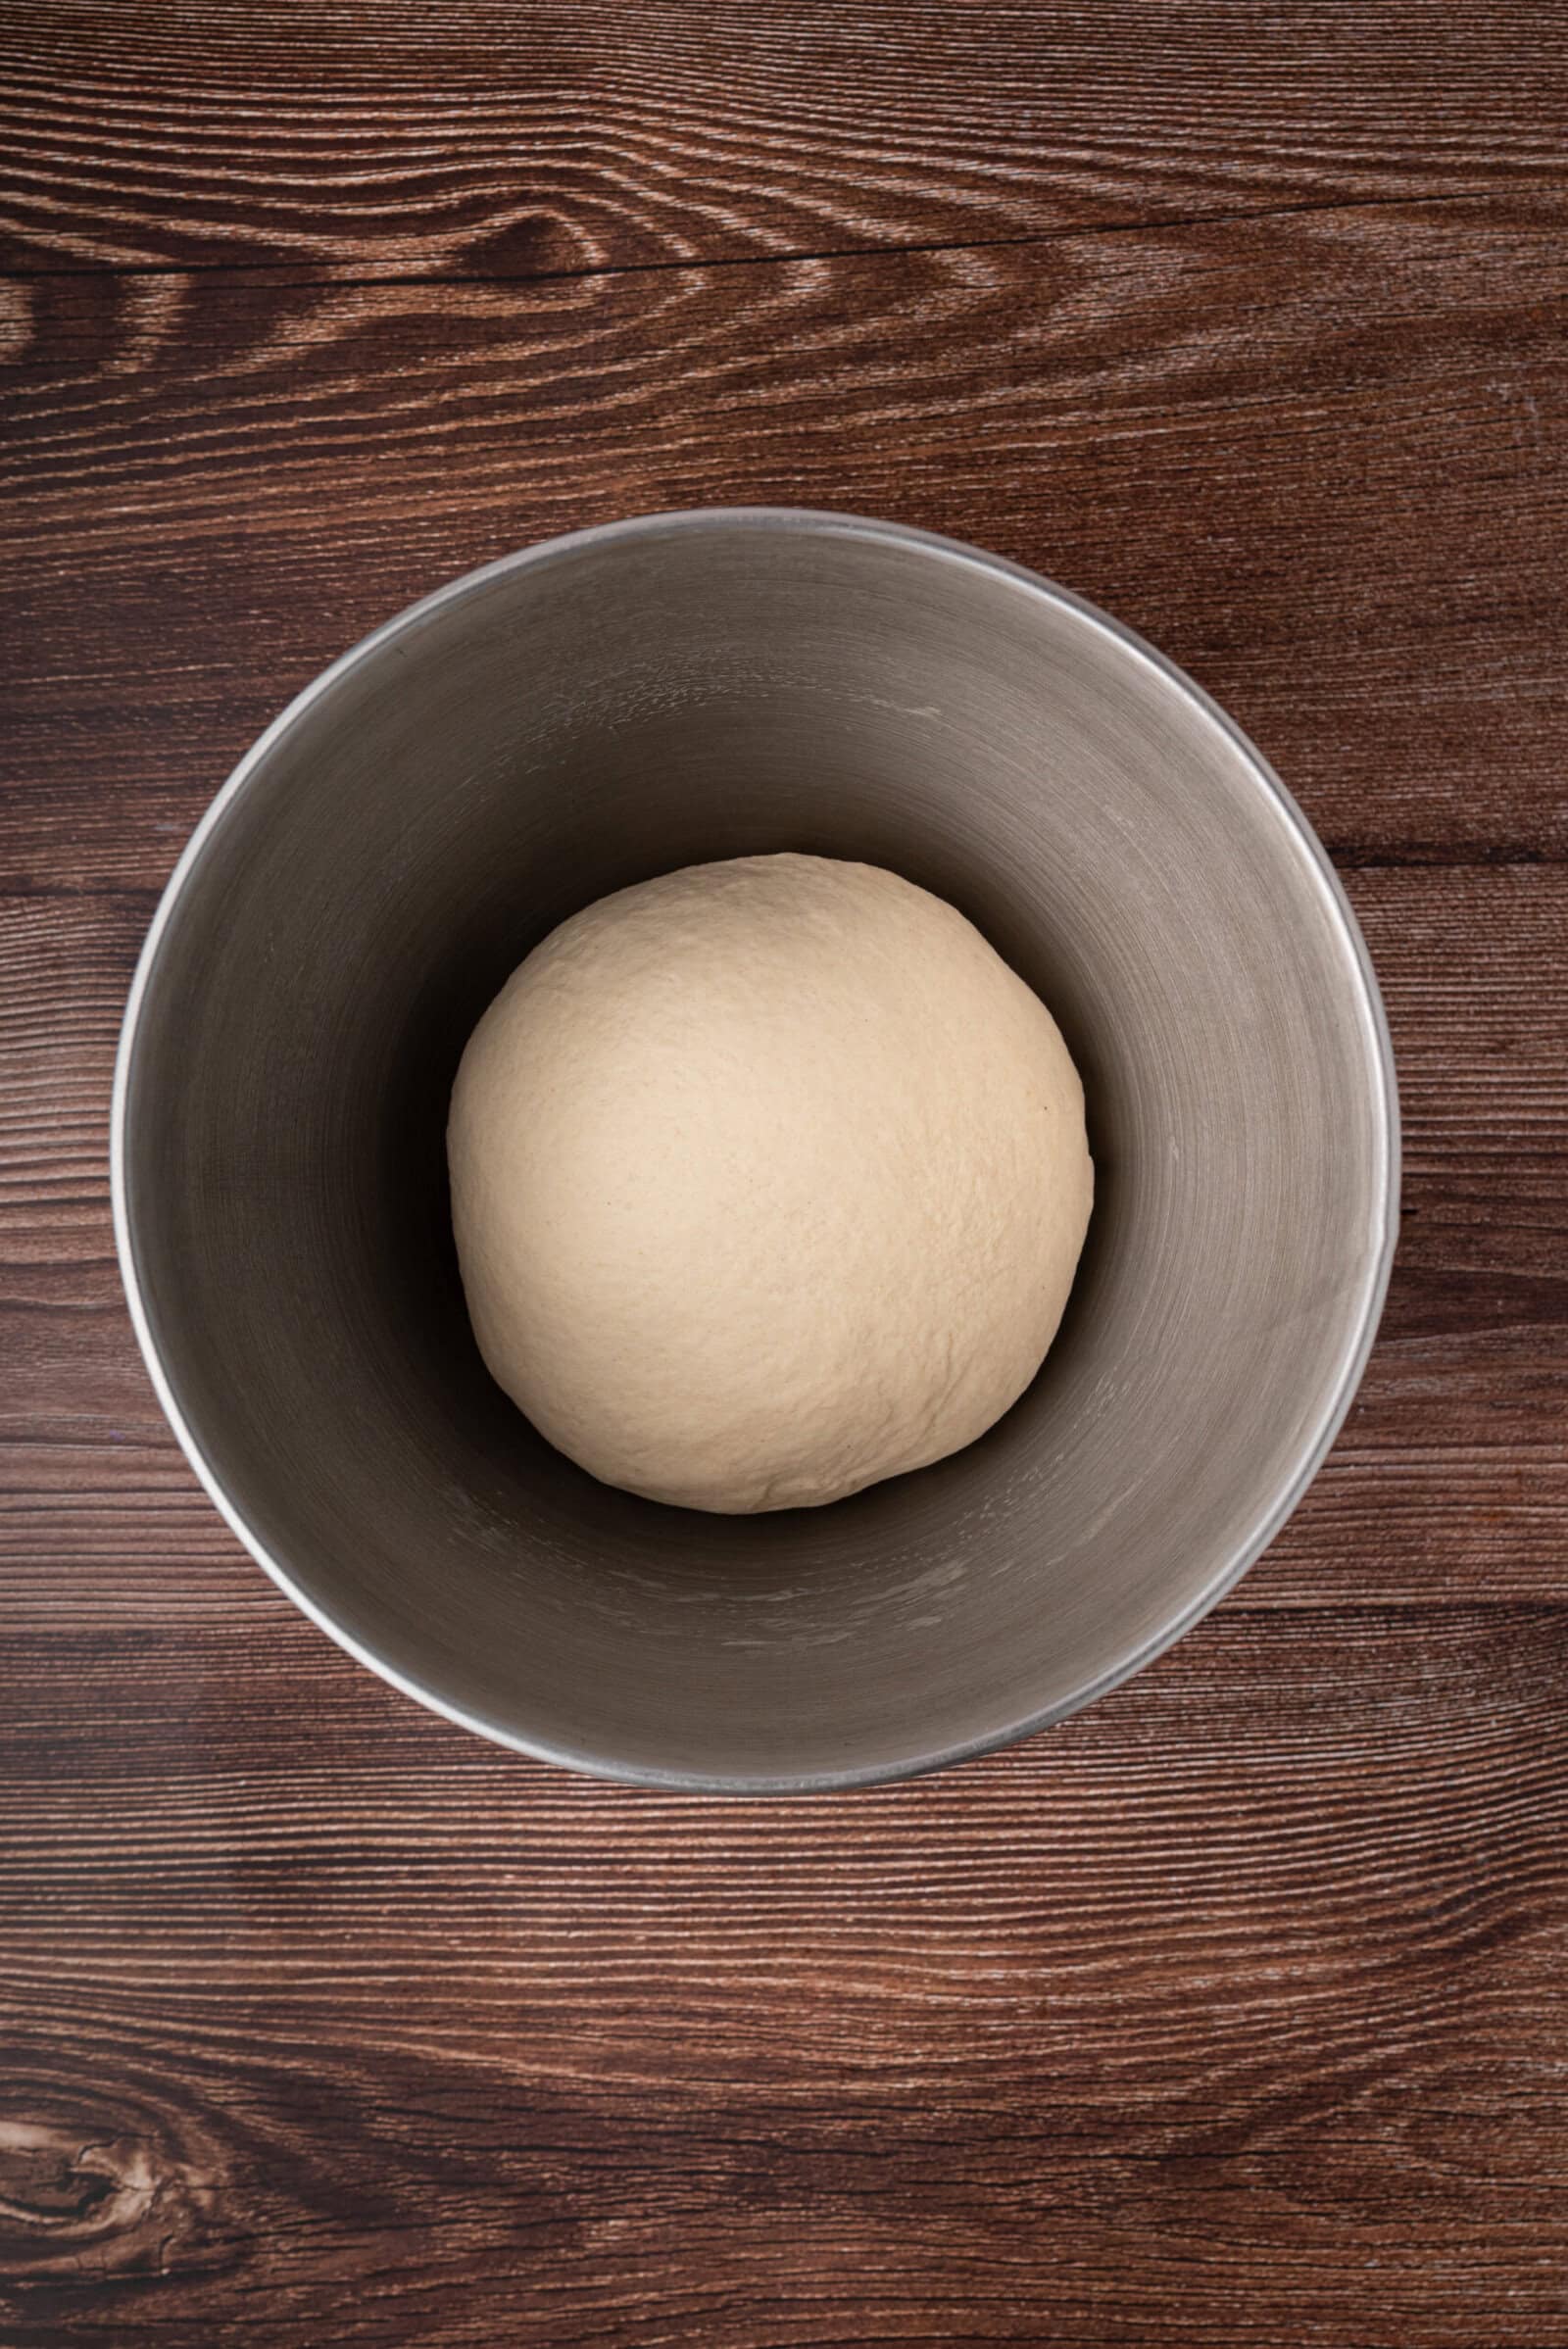
Step 4: Bulk Fermentation and First Rise
After your dough has passed the window pane test, let the dough rest and rise at room temperature (ideally 70–75°F), covered, for 2-4 more hours.
If you need to speed up this process, you can place your dough in a warm place, but watch it carefully! The same is true if you are experiencing warm weather and your kitchen is much higher than the suggested temperature.
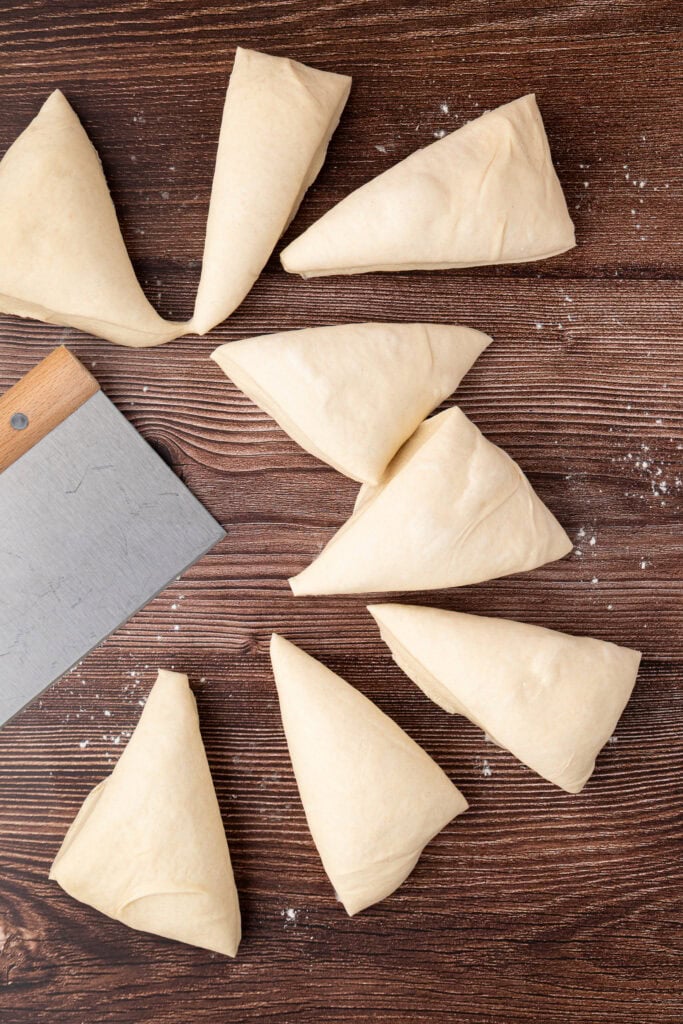
Step 5: Divide and Shape the Buns and Second Rise
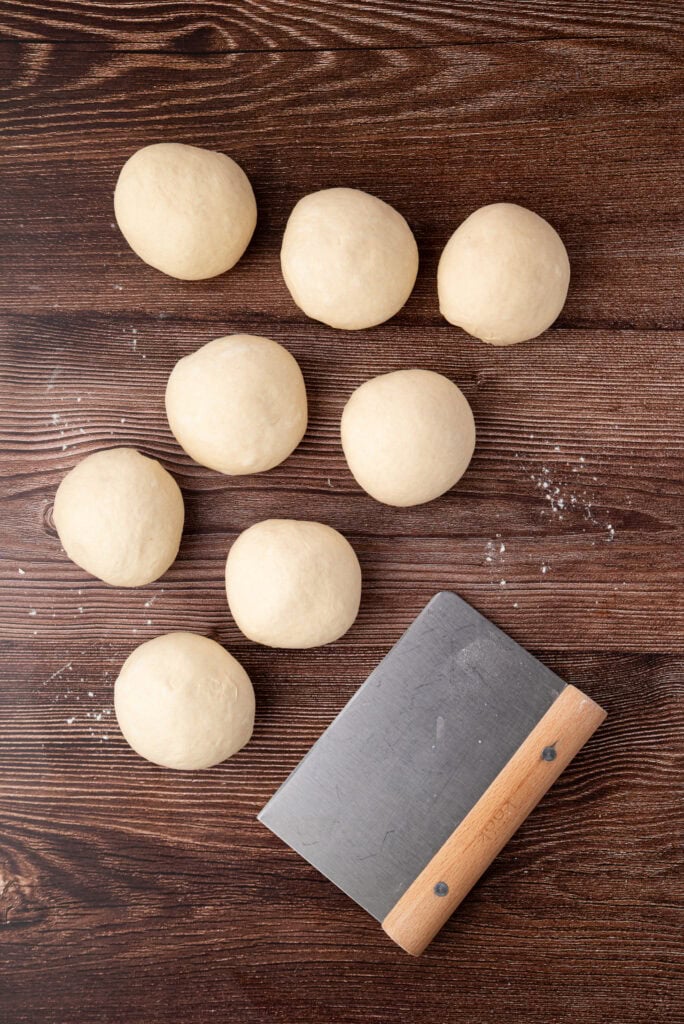
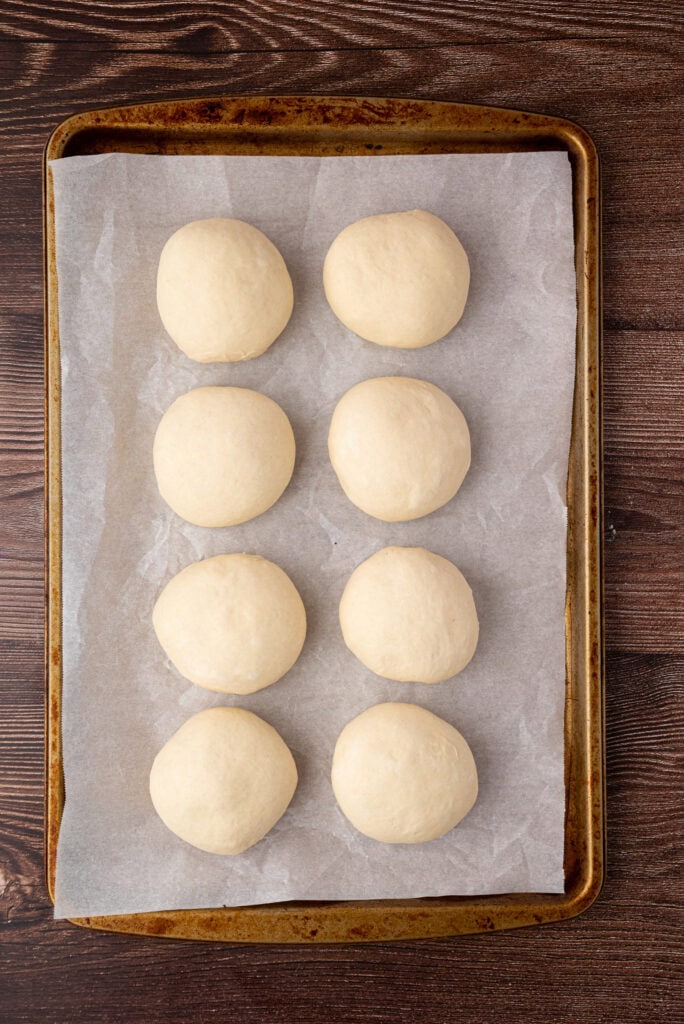
Once the dough has nearly doubled and feels puffy and airy, turn it out onto a lightly floured work surface. Divide into 8 equal pieces and gently shape each into a tight round. A digital scale helps keep each round similar (around 130-ish grams). A bench scraper is also a nice tool to use for this process, but it is optional.
When shaping, it is best to pull the dough tight on one side and pinch a seam on the other. You will set the shaped buns down on the baking sheet, seam side down.
Place the shaped buns on a parchment-lined baking sheet, spaced evenly apart. Lightly flatten the tops with your palm. Cover loosely and proof at room temp for 2–3 hours, or until they’ve puffed and look airy. Watch the dough versus going by the time. The dough and room temperature play an important part in how long this will take.
You can also perform the “poke test” to see if they have proofed long enough. When you poke the buns with your finger, the dough should slowly return to it’s normal position. If it springs back immediately, it needs more time. If it doesn’t spring back at all, it is overproofed. Don’t worry, you will get this down quickly!
Step 6: Bake
Whisk together one large egg and 1 tablespoon of water. This is your egg wash. You can definitely skip this step, but it adds a nice touch of color and crispness to the tops and helps the sesame seeds stick.
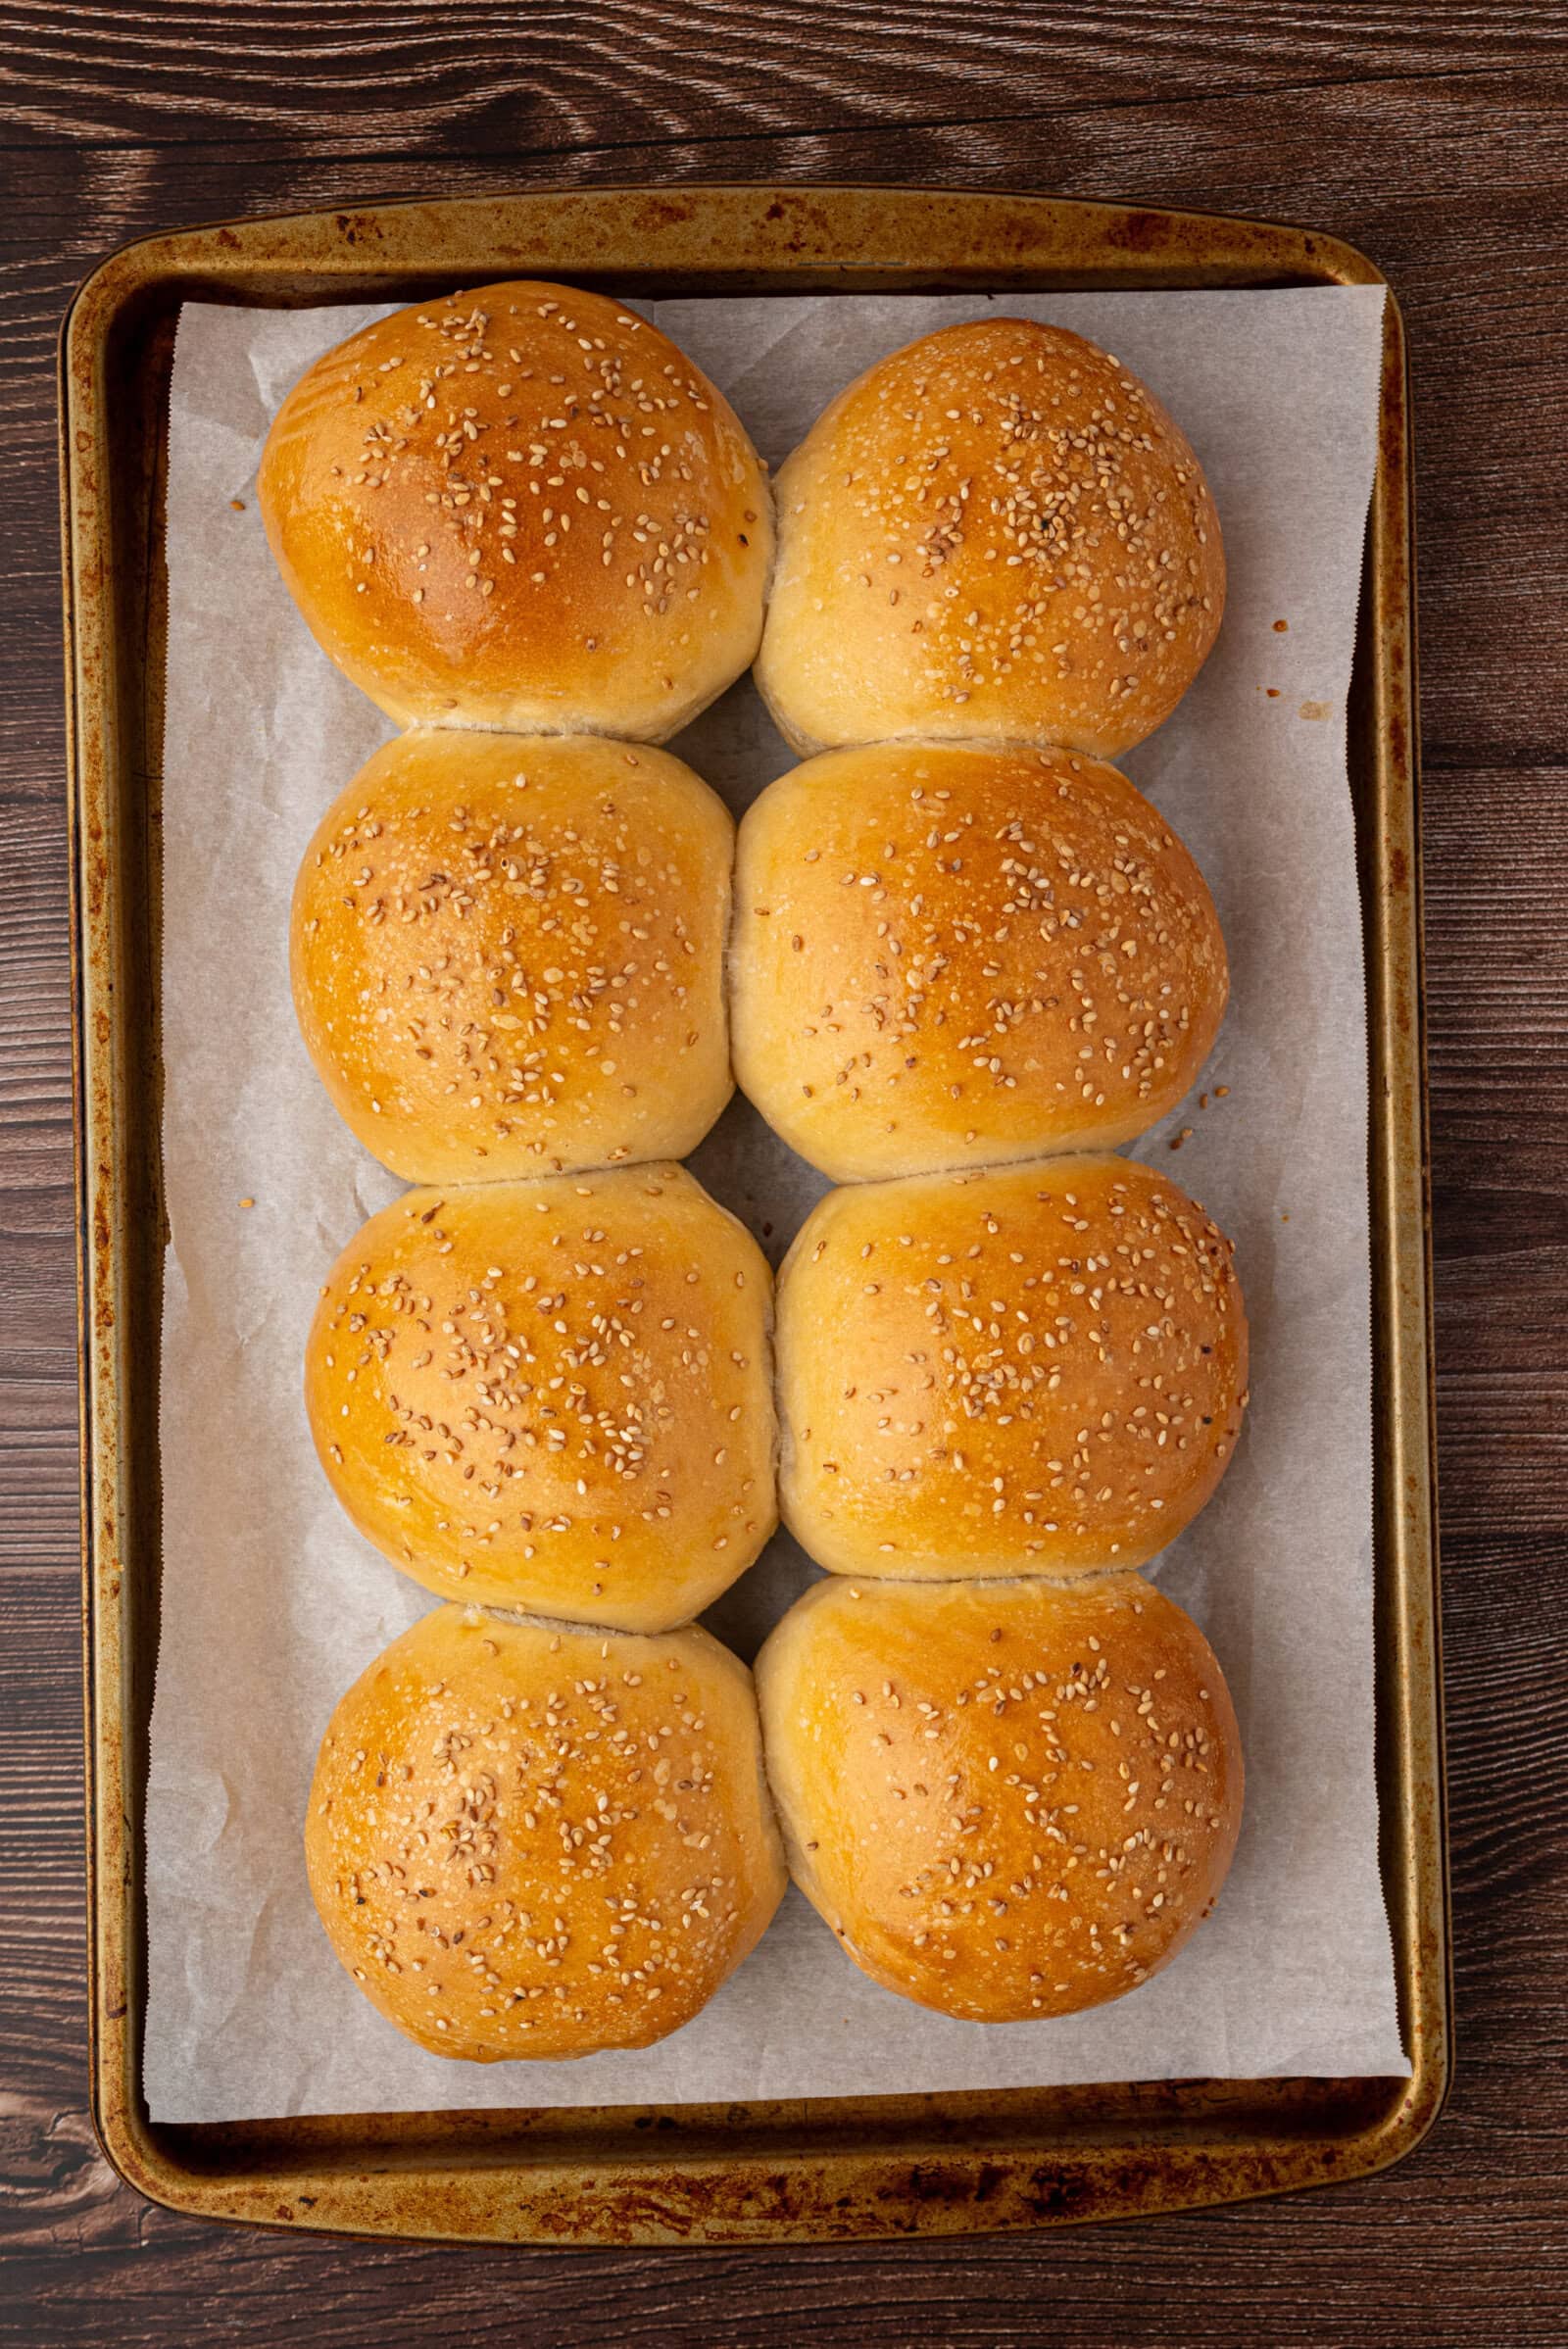
Preheat the oven to 375°F (190°C). Brush each bun with egg wash and sprinkle the tops of the buns with sesame seeds, if using.

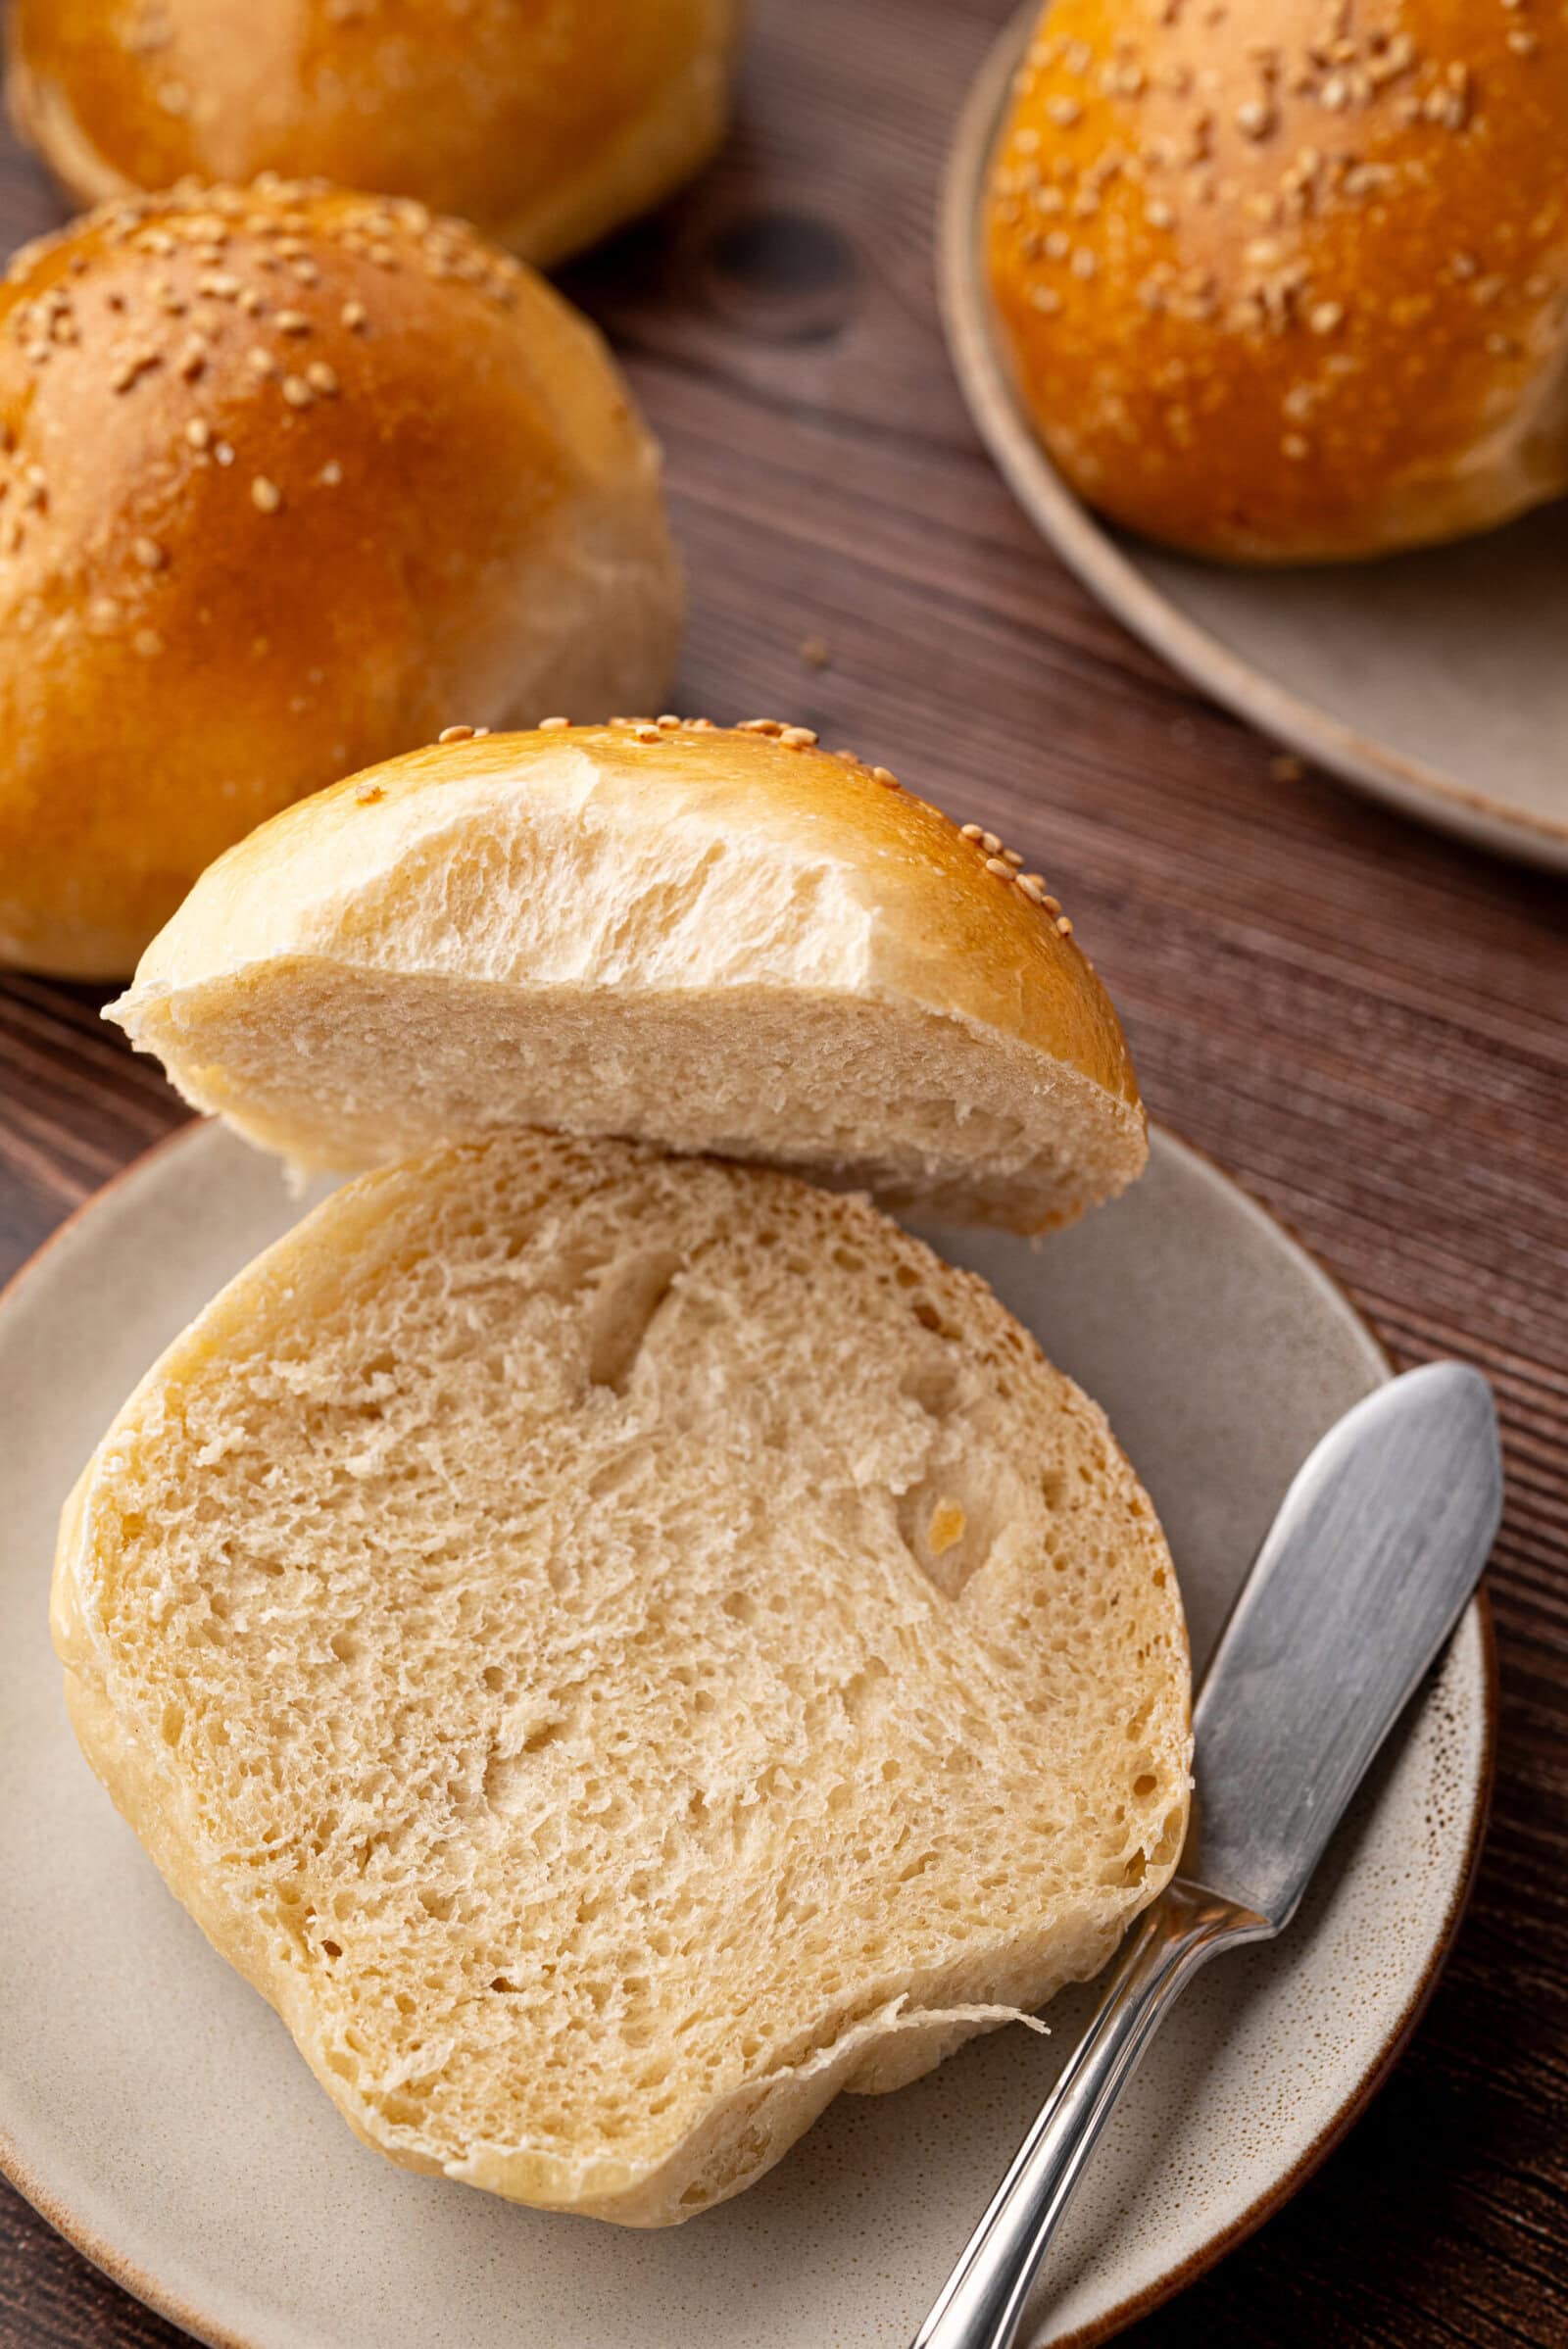
Bake for 20-25 minutes, or until the buns are golden brown and hollow-sounding when tapped on the bottom. If you have an instant digital thermometer, look for 190-200º F.
Cool completely on a cooling rack before slicing. Don’t skip this step or your buns will be gummy inside!

Easy Sourdough Burger Buns (Same-day Recipe!)
Equipment
- Mixing bowl
- dough whisk or stand mixer
- dough scraper
- kitchen scale
- parchment paper
- baking sheet
- pastry brush
Ingredients
- 1 cup active sourdough starter 200g
- 3 ⅓ cups all-purpose flour 500g
- ⅓ cup bread flour 50g
- 2 tablespoons sugar 25g
- 2 teaspoons sea salt 10g
- 1 cup whole milk lukewarm (230g)
- 3 ½ tablespoons unsalted butter softened (50g)
- 3 tablespoons water 50g, adjust as needed
- 1 egg + 1 tablespoon water for egg wash optional
- sesame seeds for garnish optional
Instructions
- In a large mixing bowl, combine the sourdough starter, flours, sugar, salt, milk, and softened butter. Mix until a shaggy dough forms, then knead (by hand or mixer) until smooth and slightly tacky, about 6–8 minutes. Add small amounts of water, as needed, for hydration.
- Cover the dough and let it bulk-ferment at room temperature (ideally 70–75°F) for 4–6 hours, performing 2–3 sets of stretch and folds during the first 2 hours.
- Once the dough has nearly doubled and feels puffy and airy, turn it out onto a lightly floured surface. Divide into 8 equal portions and gently shape each into a tight round. A digital scale helps keep each round similar (around 130-ish grams).
- Place the shaped buns on a parchment-lined baking sheet, spaced evenly apart. Lightly flatten the tops with your palm. Cover loosely and proof at room temp for 2–3 hours, or until they’ve puffed and airy looking. (Watch the dough versus going by the time. The dough and room temperature play an important part in how long this will take.)
- Preheat the oven to 375°F (190°C). Brush each bun with egg wash and sprinkle with sesame seeds, if using.
- Bake for 20-25 minutes, or until golden brown and hollow-sounding when tapped on the bottom. If you have an instant digital thermometer, look for 190-200º F. Cool completely before slicing.
Notes
The egg wash is not necessary, but gives them a nice shiny appearance. After shaping the buns, you can refrigerate them overnight for a slow final proof. Let them come to room temperature for 1 hour before baking the next day. The buns will keep for 3-4 days at room temperature in a sealed container or bread box. They can be refrigerated or frozen (unfilled) for longer storage. Freeze baked, cooled buns in a zip-top bag for up to 2 months. Thaw at room temp and refresh in a warm oven for a few minutes.
How to Store, Freeze, and Reheat
The buns will keep for 3-4 days at room temperature in an airtight container or bread box. They can be refrigerated or frozen (unfilled) for longer storage.
Freeze baked, cooled buns in a freezer-safe container or freezer bag for up to 2 months. Thaw at room temperature and refresh in a warm oven for a few minutes.
If you just want to warm the buns slightly before serving, place them on a baking pan and heat in a warm oven (300°F) for a few minutes or until warm to the touch. Don’t let them heat for too long, or they will dry out.
Save this recipe for later by pinning it!

FAQs
Can I make these sourdough burger buns dairy-free?
Yes! Substitute plant-based milk and vegan butter (or light-tasting olive oil). The result may be slightly less rich but still soft and flavorful.
Can I use sourdough discard instead of an active sourdough starter?
These buns rely on an active starter for fermentation and rising. Discard won’t provide the same life, but you could supplement with a small amount of instant yeast (1/2 teaspoon) if needed.
How do I make my sourdough burger buns lighter and fluffier?
Make sure to allow a full proof, don’t rush it. Also, ensure proper gluten development during kneading, and avoid adding too much flour during shaping.
What flour is best for sourdough burger buns?
A mix of all-purpose and bread flour gives the buns both tenderness and structure. You can substitute white whole wheat for up to 25% for a slightly more wholesome option.
Can you make these sourdough burger buns with freshly milled flour?
Yes, you can make these with all freshly milled flour, but they will be more dense. If using freshly milled flour, I recommend using 25% hard red and 75% hard white. If you have Kamut on hand, do 15% hard red, 15% Kamut, and 70% hard white. Also, watch your proofing times closely because freshly milled flour tends to proof much faster than store-bought all purpose flour.
Why did my buns turn out flat or dense?
This is usually due to under-proofing, over-flouring during shaping, or not enough strength in the dough. Make sure your starter is active and bubbly, and give the buns time to rise fully before baking.
Did you make this recipe?
Please leave a 5-star review so that others can try it as well! Mention us @thefromscratchfarmhouse on Instagram so we can see your creations! You can also leave a comment below!
For even more delicious sourdough recipes, you may like these:

Easy Sourdough English Muffins

Sourdough Discard Blueberry Muffins