This post may contain affiliate links. Please read our affiliate disclosure.
I can still remember my sister-in-law coming to visit with her newborn baby. I’ll admit, I was both intrigued and disgusted when she went to change my niece’s diaper and used cloth diapers and wipes. I had so many questions…
“What do you do with the poop?”
“You mean you actually put those in your washer?’
“Do they smell?”
I had three children at the time, two of whom were in diapers. I loudly proclaimed I would never put poopy diapers in my washer. Then I started researching. Before I knew it, I had fallen down the rabbit hole of toxins in diapers and the environmental impact of disposables. Within just a few weeks of that visit, I had bought my first cloth diapers.
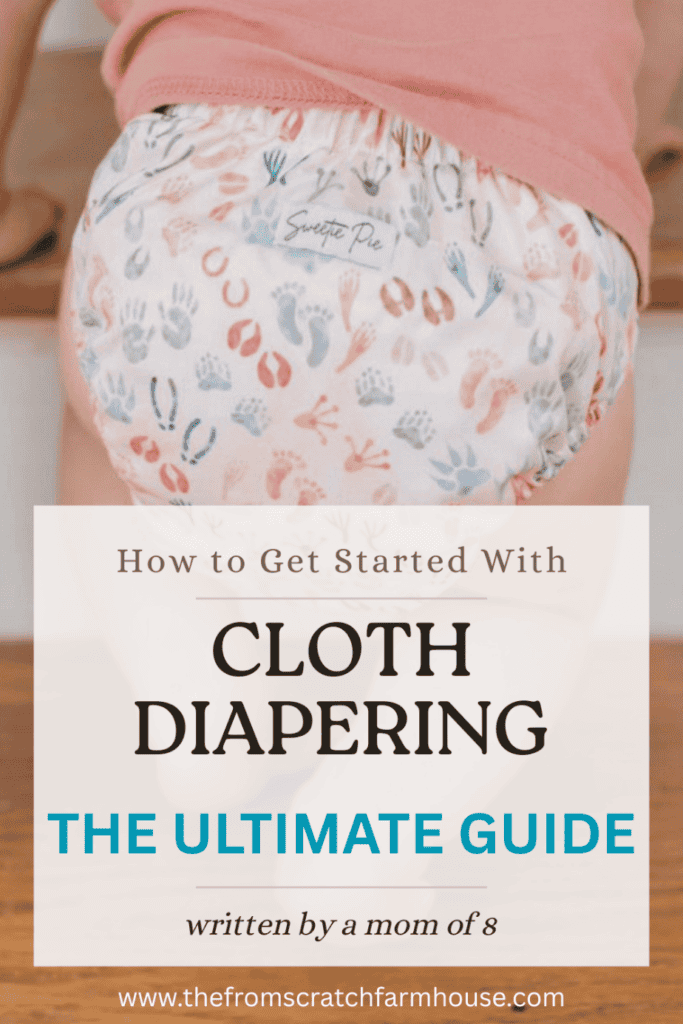
I’d like to say that I bought the cloth diapers, and then it was happily ever after. Unfortunately, I experienced a lot of trial and error when it came to everything from washing routines to finding the perfect nighttime diaper. My goal with this Ultimate Guide to Cloth Diapering is to keep you from having to make the same mistakes that I did or having to spend hours researching. Instead, I walk you through everything you need to know to get started, share my tried-and-true cloth diapering routines, and answer the most common questions from those getting started with cloth. I also think this guide will be helpful to those who have been cloth diapering for years, but just need to troubleshoot an issue, such as smelly diapers.
If you have additional questions about cloth diapering, feel free to reach out to me at staci @ thefromscratchfarmhouse. I will continue to update this guide with the answers to your questions!
Why choose cloth diapers over disposables?
Here are the biggest benefits of cloth:
1. Save Thousands of Dollars
When you first look at the price of investing in cloth diapers, you may wonder – do cloth diapers actually save you money? I think the reason for the sticker shock is that we don’t often calculate the true cost of using disposable diapers and wipes over your child’s diapering years. Personally, I would just throw a box of diapers in my grocery cart and not think too much about what they cost in the long run. It wasn’t until I was trying to get my husband on board that I sat down to do the math. I was blown away by the total cost of using disposables! Here are the facts…
Cloth diapering can save families an estimated $1,400–$5,000 per child (depending on the brands you use)—even after factoring in water, detergent, and electricity for washing.
What do disposable diapers cost?
- A baby typically uses 6,000–7,000 diapers from birth to potty training.
- 2500 – 3000 of those diapers will be changed in the first year!
- At $0.25–$0.35 per diaper, that’s $1,750–$2,450 over 2.5 years.
- “Nontoxic” disposable diapers are generally more like $0.50-$0.75 per diaper, which would be more like $3500-$5250
What does it cost to cloth diaper?
- A full stash of cloth diapers might cost $300–$800, depending on the brand.
- You can reuse them for multiple children, or resell them and get back 40–60% of what you paid.
- Laundry costs average around $150–$300/year, depending on your detergent and electricity costs.
Real-life example:
A mom of 2 who cloth diapers both children could save over $4,000 total—and still sell her stash when she’s done.
My original cloth diaper stash is still in my rotation (along with the cloth diapers I created) after 6 cloth diapered babies! Assuming I would have gone with the cheapest nontoxic disposables, that is about $17,000 in savings (after accounting for diaper and washing costs)!
2. Reduce Environmental Impact
Disposable diapers are the third-largest single consumer item in landfills and take up to 500 years to decompose.
- The average baby will go through 1 ton of disposable diapers, contributing to over 20 billion diapers in U.S. landfills every year.
- Cloth diapers can be reused for years and passed on to siblings or sold used
- Even part-time cloth use can divert hundreds of diapers per month from landfills.
3. Fewer Chemicals on Baby’s Skin
One thing that was so strange to me as a new mom was normalizing diaper rashes. I would ask my pediatrician about my baby’s rash, and the response would be “It’s normal, just put some cream on it.”
While we have continued to deal with occasional diaper rashes over the years due to food allergies or reactions to medications, I now don’t see them as just a normal part of baby life.
Disposables often contain:
| Sodium polyacrylate (super absorbent polymer) |
|---|
| What it is: A powder that turns into a gel when wet—this is what keeps disposables feeling “dry.” Risks & concerns: • Was linked to toxic shock syndrome (TSS) in tampons in the 1980s, which led to its removal from feminine products—but it’s still used in diapers. • Can cause skin irritation in some babies, especially if the gel escapes the diaper and sits on the skin. • Long-term skin exposure and the risk of inhalation (during diaper changes) raise concerns, especially for babies with eczema or sensitive skin. Bottom line: It’s effective at absorbing, but not without risk, especially for babies prone to rashes or allergies. |
| Dioxins from bleaching |
| What it is: Dioxins are a byproduct of chlorine bleaching—used to make diapers bright white. Risks & concerns: • Classified by the EPA as highly toxic and a known carcinogen (cancer-causing). Can cause reproductive and developmental problems, damage the immune system, and interfere with hormones. • While diaper companies claim levels are extremely low, even trace exposure over time has raised concern among scientists and parents alike. • Dioxins accumulate in fat tissue, so repeated exposure over months or years can be harmful. Bottom line: There’s no safe level of dioxin exposure, especially for developing babies. Many cloth diapering families choose cloth to avoid this risk entirely. |
| Fragrances and dyes |
| What they are: Added for scent or to color parts of the diaper (like wetness indicators or branding). Risks & concerns: • Fragrances are proprietary blends, so companies aren’t required to list exact chemicals—this means you don’t always know what’s in there. • Common issues include skin irritation, allergic reactions, and even endocrine disruption (some fragrance chemicals can mimic hormones). • Dyes have been linked to contact dermatitis and rashes in babies, especially if they’re sensitive or allergic. Bottom line: “Fragrance-free” and “dye-free” diapers exist, but many mainstream brands still use these ingredients. Cloth diapers avoid this entirely unless you choose scented detergent. |
4. Earlier Potty Training
Cloth-diapered babies tend to potty train 6–12 months earlier than disposable-diapered babies, on average.
Why? Because cloth allows babies to feel the wetness, which helps them recognize when they’ve gone. Disposables are so absorbent that they often mask this sensation, always leaving them with a dry feel.
In fact, I no longer worry about potty training at all. My toddlers reach a point where they are excited about “big kid undies” and simply potty train themselves.
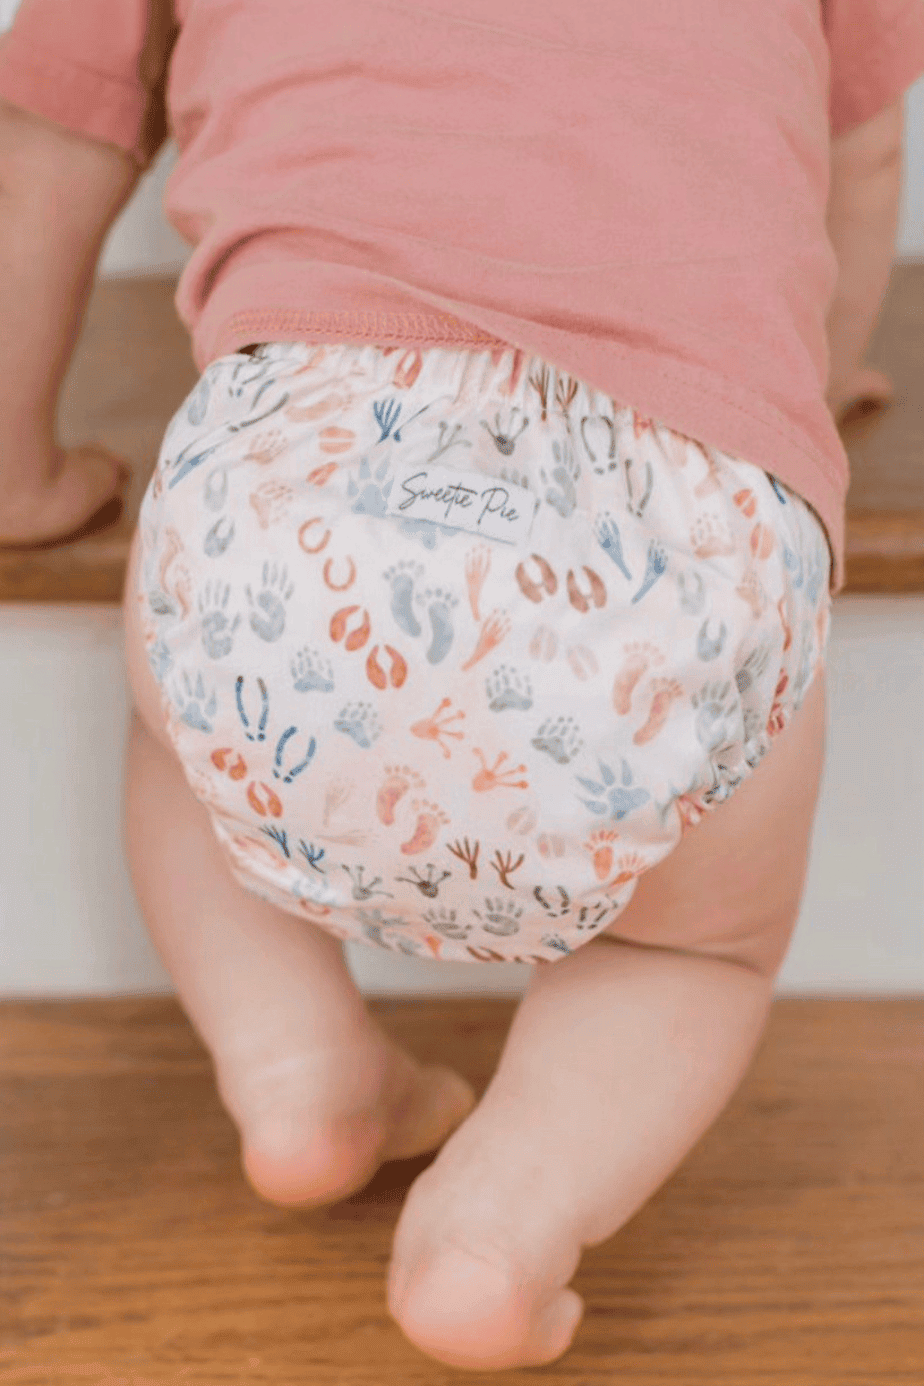
5. Cute, Customizable & Resellable
Let’s be honest: cloth diapers are adorable. From Bible inspired prints to minimalist neutrals, there’s a print and style for every vibe. Aside from their cute aesthetic, moms can choose a type of cloth diaper that fits their baby best. This can be based on size, shape, and how much their baby wets, for a perfect fit and function.
You can also resell cloth diapers for 40–60% of their original value on platforms like:
- Facebook Buy/Sell/Trade groups
- Mercari
- Local mom groups
Disposables are definitely not as cute or customizable, and you sure aren’t getting any of your money back after use.
6. Flexible, Adjustable, and More Leak-Proof
Cloth diapers are super adaptable:
- Many brands have snap or Velcro sizing that grows with the baby from birth to potty training
- Boosters and inserts can handle heavy wetters, nighttime, or poopy diapers that used to lead to “blowouts.” I used to think that leaks were just a part of having a baby. Every time my babies pooped I expected to change their entire outfit! This is not the case with cloth. If you get leaks with cloth diapers, all you need to do is make a few adjustments.
- Wool covers are great for sensitive skin and for overnight use. There are even ways to cloth diaper with 100% all-natural materials!
Cloth Vs. Disposables
| Benefit | Cloth Diapers | Disposables |
| Cost over 2.5 years | ~$500–$800 (with reuse/resale) | $1,800–$2,500+ |
| Environmental impact | Reusable, minimal waste | 6,000+ diapers in a landfill per baby |
| Skin health | Natural fabrics, fewer chemicals | Synthetic materials, potential irritants |
| Potty training | Often earlier | Usually later |
| Style & fun factor | 10/10 adorable prints & styles | 2/10, pretty meh |
What about nontoxic disposables?
There may be legitimate reasons why you cannot cloth diaper (or at least not full-time). For example, your daycare may not allow cloth diapers. In these situations, I do think that the healthier, more “nontoxic” disposable options are a great alternative. However, there are still many reasons to choose cloth over nontoxic disposables.
- They are expensive. As shown above, the cost of purchasing these diapers over the child’s first few years of life is $3500-$5250. For most people, this is simply not in the budget.
- They are still not good for the environment. They contain SAP (super absorbent polymer), plastic liners, and synthetic backings. These materials don’t biodegrade and can sit in landfills for hundreds of years.
- They still contain ingredients that have not been proven safe. Some brands may avoid fragrances and chlorine, they do contain proprietary ingredients, dyes, and preservatives in the top sheet or wetness indicators. Babies with eczema or sensitive skin may still react to the materials in “natural” disposables. Even plant-based ingredients can be irritating if they’re processed or blended with synthetics.
What do you need to get started with cloth diapering?
The number one reason people show interest in cloth diapering, but then never give it a try, is the overwhelming question of “What do I buy?” and “What is enough cloth diapers?” It is all too easy these days to throw a box of disposables in your grocery cart. Here is a simple breakdown of exactly what you need to get started with cloth diapering.
What You Need to Cloth Diaper a Newborn
- 6-8 all-in-one newborn diapers for out and about or quick changes (these go on just like disposables – perfect for car diaper changes or other caregivers)
- 24 newborn prefolds or size 1 inserts (the absorbent part that goes in the covers)
- 2 Snappis if you choose prefolds (these hold your diapers around your baby; not needed for inserts)
- 10-12 newborn covers (the waterproof part that goes with prefolds or inserts)
- 2 newborn fitteds (SUPER absorbent and great for nighttime)
- 2 newborn stay-dry boosters (place them inside your fitteds so that baby doesn’t feel wet or get rashy at night)
- 2 newborn wool or fleece covers (great nighttime covers for over fitteds that allow for some airflow, yet hold in leaks
If you are considering cloth diapering from the time your baby is born, there are a few things you should consider. First of all, for a few days after birth your baby will poop what is called meconium. It is like black sticky tar and doesn’t come off cloth well. Aside from this, keep in mind that you probably won’t be up to doing laundry. For this reason, most cloth diapering moms, myself included, use disposables for at least the first week. Even if you aren’t sure, I highly recommend having a box of disposable newborn diapers on hand just in case those first few weeks are harder than you anticipated.
What You Need to Cloth Diaper a Baby Older than 2 months
If you are getting started with cloth after your baby is 12-13 pounds, there is no need for newborn diapers. Here is what I recommend for babies from about 2 months of age to potty training:
- 5 all-in-one diapers for out and about or quick diaper changes (these go on just like disposables – perfect for car diaper changes or other caregivers). Of course, you can also just buy 16-20 of these for full-time use, but that is definitely not the most budget-friendly option.
- 20 medium-size prefolds or size 2 inserts (the absorbent part that goes in covers or gets stuffed inside pocket diapers)
- 10-12 waterproof covers (handy because you can wipe them down and get a few uses before washing)
- Optional: 2 fitted diapers (a great breathable overnight option)
- Optional: 1-2 wool covers (for nighttime)
or
- 16-20 pocket diapers (stuff with prefolds or inserts) + 16-20 absorbent inserts or prefolds
or
- A combination of waterproof covers and pocket diapers (16-20 total). I personally love both for different stages and situations, and have both!
- 16-20 absorbent inserts or prefolds
- Optional: 2 fitted diapers (for nighttime)
- Optional: 1-2 wool covers (for nighttime)
Other Cloth Diapering Necessities for All Ages
- Wipes. Yes, you can use disposable and just pull them out of the diapers before washing, but I promise that disposable wipes are an easy addition to your cloth routine. If using disposable, you should have 50-60 wipes, assuming you are washing every 2-3 days.
- Wet bags and/or a diaper pail. I’ve tried all of the different options and here is my preference: a small wet bag for on the go and a simple lidded (but not airtight) garbage can for at home. There are large wet bags to use as a pail liner, too, but I found them a pain to clean and prefer just wiping out the garbage can. Also, wet bags can be very airtight, which can lead to smell issues, so be cautious of that.
- Cloth-safe laundry detergent. So here is the deal… I use my own homemade detergent, however, I wouldn’t say that is what most experts “recommend.” I can say that it has worked great for me for all 12ish years of cloth diapering, so I have no intention of stopping now! I’ve also had no issues because of it. With that said, if you want a list of other “cloth safe” options, Fluff Love University is an industry “expert” on the matter. If you choose a detergent off their list, though, PLEASE do not use their “recommended amount.” Instead, see how to wash your diapers below.
Optional Cloth Diaper Supplies
- Diaper sprayer. I use one and love mine, but you can definitely cloth diaper without it. It is not needed until your baby is no longer exclusively breastfed, so that extra cost can be put off until you are well into your cloth diapering journey.
- Cloth diaper liners. I use fleece (stay-dry) inserts in my diapers that don’t already have a stay-dry layer. I just don’t love my babies feeling wet and it can make dealing with poop very easy. Some people don’t want anything synthetic touching their baby’s skin, though, which I can understand as well. There are both washable diaper liners and disposable liners available.
- Wipe warmer. I like to pre-moisten my wipes, mix them with a TINY bit of baby-safe soap, and keep them in a wipe warmer. I switch these out every few days. This keeps the wipes ready-to-go and warm, but you can definitely do it other ways. Some people just wet the wipes by a nearby sink or use a spray bottle of water to wet them. Packing your diaper bag? Just grab a few from your wipe warmer and place them in a small waterproof bag.
Different Types of Cloth Diapers (With Pros and Cons)
When most people think of cloth diapers, they think of big cloths or flour sack towels, pins, bleach buckets, and plastic pants. Modern cloth diapers have come a long way! There are now a variety of diaper styles, better alternatives to dangerous pins, no bleach buckets, and cute waterproof materials in place of plastic pants. Ultimately, the best type of cloth diaper for your baby is going to depend on their size, shape, and your personal preferences. I can’t say I know of a cloth-diapering mom who doesn’t at least have a few different types for different situations, since the best option often changes by the day. Here is a rundown on each type:
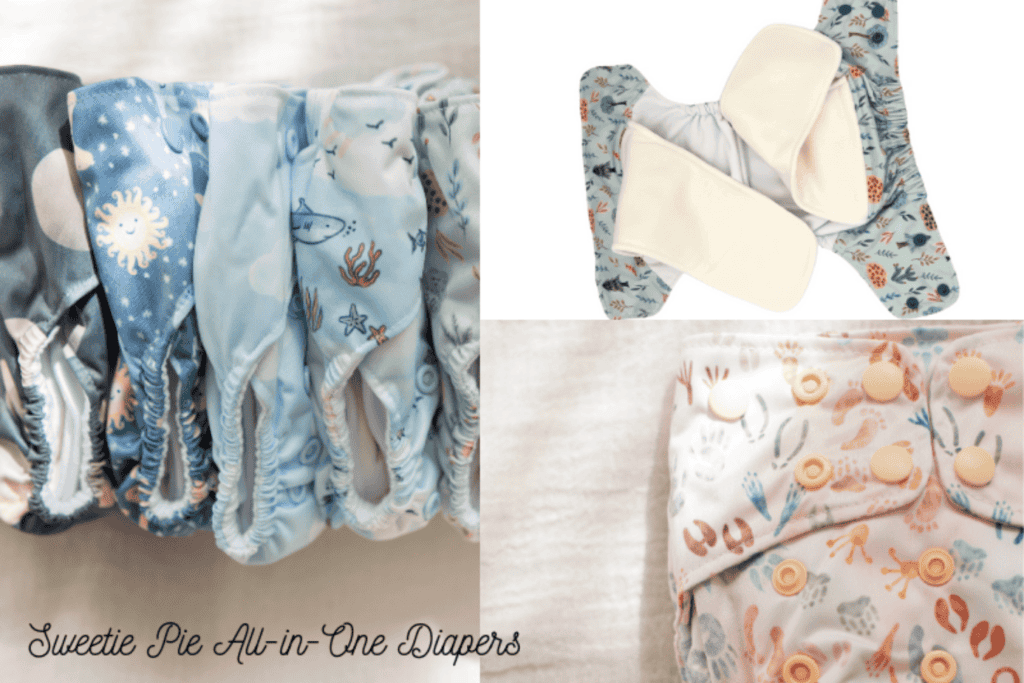
All-in-Ones (AIOs)
These are the most “grab-and-go” cloth diapers. The absorbent material is sewn into the waterproof cover, so there’s no stuffing, folding, or layering. You use it, wash it, and reuse it—just like a disposable. These can either be secured with Velcro or snaps. Velcro can provide a nice custom fit, but it can be a pain to wash and may wear out over time. Both newborn and “one-size” diapers are available. Both often have snaps on the outside of the diaper to accommodate different-sized babies.
| ✅ Pros: | ❌ Cons: |
|---|---|
| – Super easy to use—perfect for beginners, babysitters, or daycare – No need to assemble anything – Often comes with adjustable snaps for different sizes | – Slower to dry because everything is sewn together – More expensive per diaper – Less flexibility with absorbency customization |
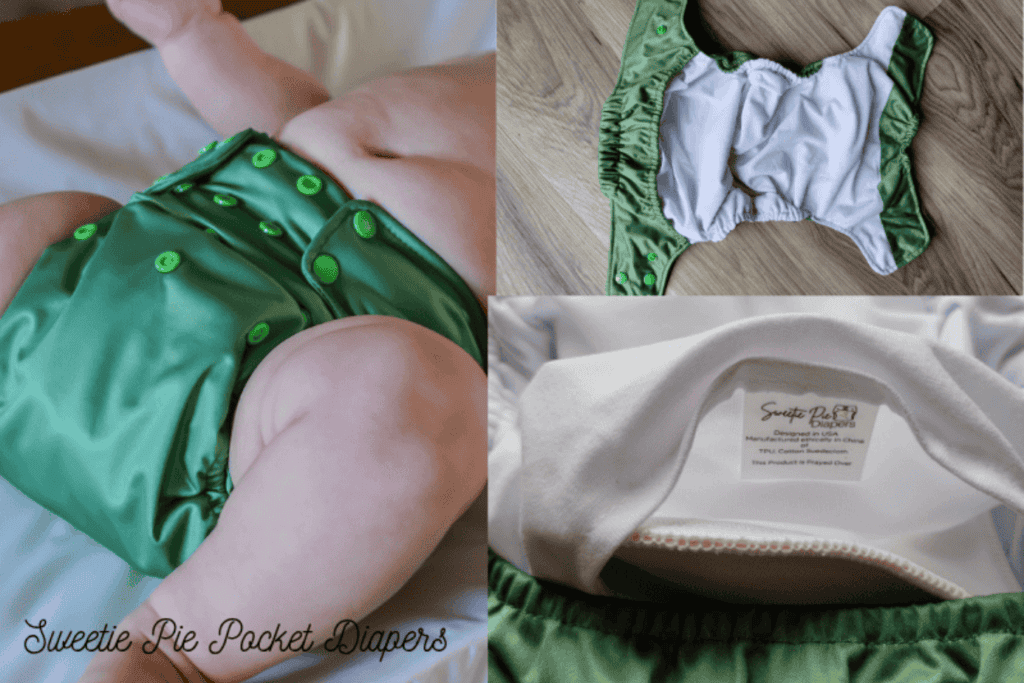
Pocket Diapers
A pocket diaper has a waterproof outer layer and a soft, stay-dry inner layer with a pocket opening where you stuff the absorbent cloth insert. You remove the insert before washing and re-stuff after drying. Most pocket diapers are “one-size” and secure with snaps.
| ✅ Pros: | ❌ Cons: |
|---|---|
| – Quick to dry since the inserts come out – You can customize absorbency with different inserts (great for heavy wetters) – Often fits trim under clothes | – Requires stuffing and unstuffing every time – Can leak if the insert shifts or isn’t placed correctly |
Prefold Diapers & Flat Diapers
These are traditional cloth diapers—flat (“flats”) or folded and stitched (“prefolds”) layers of cotton or bamboo. Flats look like a flour sack towel (in fact, many use just that!). They need to be folded and fastened around the baby or folded and laid in a cover. They are always paired with a separate waterproof cover.
| ✅ Pros: | ❌ Cons: |
|---|---|
| – Most budget-friendly option – They wash well and don’t hold on to smells or build-up – Super fast to dry – Versatile—can be used as burp cloths, changing pads, etc. | – More learning curve (folding and fastening) – Not as convenient for quick changes or out-and-about use – When folded or secured around baby, they aren’t usually “stay dry” since the entire diaper gets soaked. The one exception I know of are these prefolds. – Needs a separate cover to be waterproof |
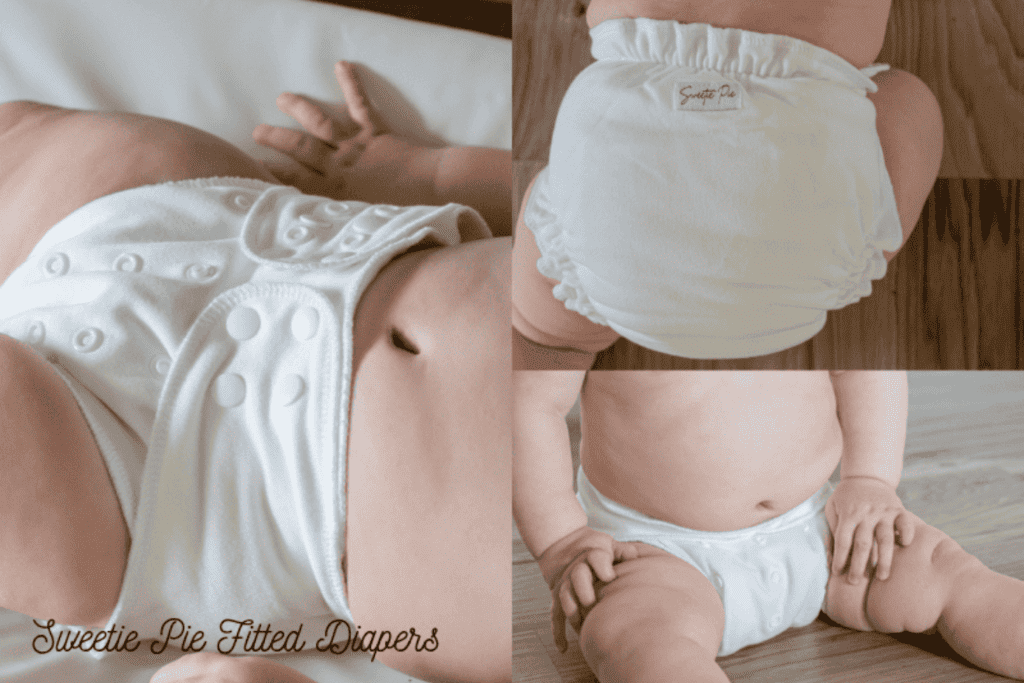
Fitteds
These look like a regular diaper with elastic around the legs and snaps or Velcro to secure them (a few just wrap with no built-in closure), but they’re made entirely of absorbent material.
No waterproof layer, so they must be paired with waterproof cloth diaper covers.
| ✅ Pros: | ❌ Cons: |
|---|---|
| – Very absorbent—great for night time, if you know your baby will be in their diaper for a long time (road trips) or heavy wetters – Easy to put on compared to prefolds – Serious “cozy” factor. I love wrapping a soft fitted around my sweet babe! | – Bulkier than other options – Takes longer to dry – Requires a cover to be waterproof – Not “stay dry” – if the diaper gets soaked, baby will feel very wet |
Cloth Diaper Covers
These are a waterproof outer shell (often made of PUL or wool) that you put over a prefold, flat, or fitted diaper. They don’t have absorbency themselves.
| ✅ Pros: | ❌ Cons: |
|---|---|
| – Reusable between changes if not soiled—just wipe and reuse – Affordable and efficient—one cover can be used with multiple inner layers – Slim-fitting | – Not absorbent on their own – Need to pair with another diapering system (like a prefold, an absorbent insert, or a fitted) |
Hybrids
These are diaper shells designed to hold either a reusable cloth insert or a disposable insert. Great for families who want some cloth benefits with some convenience.
| ✅ Pros: | ❌ Cons: |
|---|---|
| – Great for travel or daycare – Less laundry than full cloth – Flexible depending on your day or situation | – Inserts may move around if not secured well (definitely my experience when I tried them!) – Disposable inserts can add up in cost – Not as eco-friendly as full cloth |
Cloth Trainers (for toddlers)
These are padded, underwear-style bottoms designed for potty training. They catch small accidents but aren’t meant to absorb like a full diaper. Some have a waterproof layer, others don’t.
| ✅ Pros: | ❌ Cons: |
|---|---|
| – Encourages independence with pull-up/down design – Softer and more comfy than disposables – Reusable and cheaper over time | – Won’t hold a full pee—may leak during bigger accidents – Not ideal for overnight or early potty training stages – Not fun to clean toddler poop out of (I only switch to these when we are no longer having accidents often) |
Newborn Diapers Vs. All-in-Ones
When you go to purchase cloth diapers, you will often see the sizing options of “newborn” vs “all-in-ones.” Newborn diapers generally have a pretty short period of usage before babies outgrow (or out-pee) them. So why make the investment? All-in-ones sound great in theory, but the fact is that they rarely fit a newborn. Also, the top of the diaper often comes up well above the umbilical cord, which can cause irritation or premature separation of the drying cord stump.
My advice is to find newborn diapers, such as my Sweetie Pie brand, that have rise snaps. This is going to allow more flexibility in sizing for babies from premie to large, last longer, and allow for increased room to add absorbency layers if needed.
Cloth Diaper Closure Systems
When choosing cloth diapers, there is often another decision to make – which closure system?
Many diapers, like all-in-ones and pockets, have both snap and hook-and-loop (Velcro and Aplix are brand names) versions. When I first started cloth diapering, I thought hook-and-loop was my preferred type. You can get a more custom fit, and there is no fumbling with snaps during those middle-of-the-night changes or with a fussy baby. I still own several hook-and-loop newborn diapers for these reasons. However, the downfalls of this closure system are that they are loud (they often startle my sleeping babies), they wear out over time, and if you aren’t careful (or sometimes even if you are!), they will stick to other things in the dryer. For the most part, I have made the switch to snaps, and now that I am used to them, they are my favorite closure type.
Where to Buy Cloth Diapers
New vs. Used
I personally don’t love buying used cloth diapers, but whether or not this makes sense for you is going to depend on a few factors. If you plan on your diapers holding up through a few children and still having a resale value at the end, then buying new, quality diapers is probably your best bet. On the other hand, if you are on your last (or only) child, then a used stash of diapers will be the most economical option.
If you decide to go with used cloth diapers, there are a few things you should consider. First of all, there is no guarantee that the prior owner used cloth-safe detergent or didn’t let their diapers sit for days on end, leading to stink issues. A quick sniff won’t always tell you either. It’s after the diapers get wet that previous problems shine through! If you find yourself with poorly cared-for diapers, this just means that you will need to spend some extra time and energy “stripping” the diapers. Not the end of the world, but worth considering.
When purchasing used diapers, there are two other things that are important to check – the velcro and/or snap condition and the elastic around the legs. These are two areas that tend to wear out over time, especially on certain brands.
Trusted brands & small shops
If you decide to purchase new diapers, I have to, of course, have to recommend my brand, Sweetie Pie Diapers. We offer several different styles of diapers, all designed by two long-time cloth diapering mamas who had set out to create the perfect diapers. We think we nailed it!
Other brands I recommend and trust are Thirsties, Rumparooz (Kanga Care), and Green Mountain Diapers (cloth-eez).
Be aware that one of the big brands on Amazon is also known as a “China Cheepie” in the cloth diaper world. In other words, they are very cheaply made overseas for several different brands and then privately labeled after production. While these can work great for some, they tend not to hold up over time and may have random manufacturing defects, leading to leaks or poor fit.
Where to buy used cloth diapers
When looking for used cloth diapers, Facebook groups can be a great place to look! There are buy/sell groups by brand, location, and other factors.
Other places to look for used cloth diapers:
- Facebook Marketplace
- Ebay
- Mercari
- Poshmark
How to Use Cloth Diapers
How to put on a cloth diaper is going to vary greatly by the type (all-in-one vs. fitted, etc). Here is a quick breakdown on how to put on each type:
How to put on an all-in-one cloth diaper:
- Place the diaper under the baby, just like a disposable diaper.
- Secure the tabs using the waist snaps or velcro.
- Snap the rise snaps to adjust the length/leg opening. This can then stay in this position until your baby grows.
How to put on a pocket diaper:
- First, stuff the pocket of the diaper with your absorbent material of choice. This could be an insert or a folded flat, or prefold.
- Place the diaper under the baby, just like a disposable diaper.
- Secure the tabs using the waist snaps or velcro.
- Snap the rise snaps to adjust the length/leg opening. This can then stay in this position until your baby grows.
How to put on a flat cloth diaper:
- First, you fold the large square into the cloth diaper fold of your choice. There are so many different folds outs there, but my go-tos are the angel wing fold or the jelly roll fold for newborns, and then the airplane fold, kite fold, origami fold, or pad-fold for older babies and toddlers. All of these can be found demonstrated on YouTube.
- Place the folded diaper under the baby.
- Pull the diaper wings around the baby to secure it. (No need to do this with the pad fold, as it just lays in the diaper.)
- Secure the flat with either pins, a Boingo (great for newborns), or a Snappi (my usual after the newborn stage). This step isn’t necessary if using in a padfold.
- Place a waterproof cover over the secured flat, making sure to tuck everything in around the legs and belly.
- Secure the cover around the waist with the snaps or velcro.
- If your cover has them, snap the rise snaps to adjust the length/leg opening. This can then stay in this position until your baby grows.
How to put on a prefold cloth diaper:
Prefolds can be worn two different ways – either folded similarly to a flat (but fewer folds, of course) or they can simply be folded in thirds and placed in the waterproof cover, similar to an insert. In the latter case, the prefold is not secured to the baby.
- Fold your prefold. For newborns, I recommend the jelly roll fold, angel wing fold, or the newspaper fold. You can find these demonstrated on YouTube. Make sure to specify in your search that it is “for prefolds.” For older babies, prefolds are generally padfolded, which means you fold them in thirds and place them in the waterproof cover, similar to an insert.
- Secure the prefold with either pins, a Boingo (great for newborns), or a Snappi (my usual after the newborn stage). This step isn’t necessary if using in a padfold.
- Place a waterproof cover over the secured prefold, making sure to tuck everything in around the legs and belly.
- Secure the cover around the waist with the snaps or velcro.
- If your cover has them, snap the rise snaps to adjust the length/leg opening. This can then stay in this position until your baby grows.
How to put on a cover with an insert:
Inserts paired with a waterproof cover are my favorite option after a baby is no longer exclusively breastfed. For newborns, runny poop can escape this set-up!
- Place the insert in the waterproof diaper cover.
- Place the diaper under the baby, similar to a disposable diaper.
- Secure the cover around the waist with the snaps or velcro.
- If your cover has them, snap the rise snaps to adjust the length/leg opening. This can then stay in this position until your baby grows.
How to put on a fitted cloth diaper:
- Place the fitted diaper under the baby, just like a disposable diaper.
- Secure the waist. Some have snaps or velcro, while others require something like a Boingo or Snappi. Alternatively, you can just depend on the diaper cover to hold it in place.
- Place a waterproof cover over the fitted diaper, making sure to tuck everything in around the legs and belly.
- Secure the cover around the waist with the snaps or velcro.
- If your cover has them, snap the rise snaps to adjust the length/leg opening. This can then stay in this position until your baby grows.
How Often to Change Cloth Diapers
Depending on how often your baby wets and your diaper set-up, the amount of time between diaper changes may vary. For example, all-in-ones are super convenient to put on and off, but usually don’t hold as much as something like a fitted. Generally speaking, newborns will require changes much more frequently as well.
With that said, my average is every 1.5-2 hours for babies up to 6 months and about every 2-3 hours after that. I also only change my babies during the night when they are newborns and not sleeping through the night. No need to wake a sleeping baby to change a diaper! See my nighttime diaper routine below for details.
What to do with Poop (breastfed vs solids)
“What about the poop?” is one of the most common cloth diaper questions, and I get it! This was my biggest concern as well. It turns out that dealing with poopy cloth diapers really isn’t a big deal. Here’s the scoop on poop…
My preference for cleaning up poop is cloth wipes. Trust me, it’s not fun to dig out poopy disposable wipes later. Cloth wipes also wash your baby better, and fewer of them are needed. You can even get them warm (I love a wipe warmer for this) for a much more enjoyable experience for your baby.
Dealing with Poop for Breastfed Babies
Exclusively breastfed babies have poop that is completely water soluable. This means there is no need to prewash them before throwing them in your washer! I know… it feels weird. But if you follow my washing routine below, your diapers will come out perfectly clean without any extra work. Simply close up a poopy diaper just like you would a disposable. The cloth wipes can get tucked inside, too. Just don’t forget to unsnap and open up your diapers before you throw them in the washer.
Dealing with Poop for Babies Eating Food or Drinking Formula
Once your baby is no longer exclusively breastfed, you will need to rinse your poopy diapers off before throwing them in the wash. There are a few different ways to do this, and everyone has their preference. Here are some options:
- Place the diaper inside the toilet bowl and use a diaper sprayer to hose off the diaper. Then, place the wet, pre-rinsed diaper in your diaper pail. (This is what I do!)
- Place the diaper inside the toilet bowl, towards the bottom, and flush, holding the diaper securely. You may need to flush a few times.
- Use some toilet paper to remove any large chunks and flush them. Place the still-soiled diaper into your pail. When you go to wash diapers, hose off the poopy diaper in your laundry room sink before tossing in your washer.
Using Cloth Diapers on the Go (daycare, travel tips)
Any of the different cloth diapering options can be packed into your diaper bag for a day out, but my favorite for these times are all-in-ones. Because these go on and off just like a disposable, they are easy enough to do on your lap in the front seat of the car or in the nursery at church without turning too many heads.
Another easy option for on the go is a combination of inserts and covers. This is especially great if your diaper bag space is limited. Also, if your cover doesn’t get dirty, you may be able to just swap out the insert, making for a quick and easy diaper change.
Make sure you pack a wetbag! A wetbag is a waterproof bag to hold soiled diapers.
You can either use disposable wipes on the go (and pull them out later), or pack some pre-moistened cloth wipes in a small waterproof bag. Just throw the soiled ones into your wetbag with the soiled diapers. Some people carry a small spray bottle of “wipe solution” to moisten cloth wipes on the go.
Not all daycares are cloth diaper-friendly. If this is something you are considering, make sure to ask about it when choosing a daycare. If they do allow cloth, they most likely have specific styles that they prefer.
I’ll be honest… I do not do cloth diapers on trips. I don’t want to be stressing about where in the world I’m going to wash diapers or taking the time to do this on vacation. I’m also aware that not everyone is comfortable with me throwing my soiled diapers in their washer. You will have to make this call based on where you are going and what laundry washing options you will have available to you.
The Perfect Nighttime Diaper for a Heavy Wetter
I’ll admit that for many years, I had a rough time loving cloth diapers for nighttime. Cloth worked great during the day, but every time I’d get my baby out of bed in the morning, they were sooo smelly and often had leaked through. In fact, I want to start by saying that if you prefer buying disposables for night and just using cloth during the day – that is not something to feel bad about!
If, however, you want to find a nighttime cloth diaper setup that holds up to a heavy wetter and doesn’t leave your baby needing a bath every morning, this is my tried-and-true combo!
- A Sweetie Pie organic hemp and bamboo cotton fitted diaper
- A Sweetie Pie stay-dry hemp insert inside of the fitted (size 1 or 2, depending on your baby’s size). For a trimmer diaper, I’ve also had luck with a fleece-lined hemp booster from another brand, but unfortunately, it doesn’t have a tag, and I couldn’t find it online to link it.
- A 100% wool cover.
The absorbency of the fitted, combined with an added insert or booster, provides plenty of absorbency. The stay-dry layer keeps baby sleeping through the night and also prevents diaper rashes. The wool cover is more breathable than a PUL cover, preventing nasty smells or rashes.
Sidenote: A nighttime diaper will never smell as “fresh” as a disposable come morning. You would need all of those toxic chemicals we are trying to avoid in order to do this! However, the smells shouldn’t knock you out, make you feel like you need to bathe your baby every morning, or cause rashes.
Cloth Diaper Storage Ideas
There is no denying the fact that cloth diapers take up a lot more room to store than a box of disposables. Here are some ways that I have organized my stash over the years…
When I had a changing table, I organized all of my diapers in the top drawer. This was probably the most convenient, but for my last few babies, I haven’t had a nursery or room for a changing table.
My seventh baby was born when we lived in a tiny trailer. In that home, I only kept out the diapers that I was currently using. Anything that was too big, etc., got stored in a Rubbermaid tote in our shed. The diapers and supplies we needed were organized in a short plastic bin under my bed. I kept the lid off so that pulling it out and grabbing what I needed was quick and easy.
In my current home, I started with having all of my cloth diapers stored in the drawers of our main bathroom. I actually designed the counter in that bathroom to be extra long so that I could use it like a changing table. It looked great, but in reality, I generally just change my babies on the floor somewhere, on my bed, or in their bassinet next to my bed when they are tiny.
Recently, I decided to add a hanging closet organizer to my master bedroom closet to store all of my diapers for two babies. This has been working great! I even have a plug-in in my closet so that I can keep my wipe warmer there as well.
Wash Routine: How to Clean Your Cloth Diapers
My Step-by-Step Wash Routine
First, I want the disclaimer that different washing machines work differently, and therefore, you may need to make slight changes to this routine for best results.
Currently, I am using a Whirlpool front loader washer and dryer. This machine has a “pre-wash” setting, which I utilize now, but I’ll also go over what I did before having that feature later.
Dealing With Dirty Diapers
- Dirty diapers go into a lidded garbage can in my laundry room. Poopy diapers are sprayed off with a diaper sprayer first.
- Before bed, I start the wash. All diapers and cloth wipes get thrown into the washer. I make sure to unstuff pocket diapers, secure velcro, unsnap snaps, etc. I use 2 tablespoons of my homemade laundry detergent in the regular detergent dispenser and about ¼ cup of oxygenated bleach in the main drum with the diapers for the pre-wash cycle. I set my washer to: normal, hot (not as hot as it will go, but 2 steps down), pre-wash on, all the way to “heavy”, and add an extra rinse. Your washer’s settings are likely different, but there are the main things to remember:
- The water should be hot.
- The diapers should sit and “soak” for a while. I’ll describe how I did this with a top loader below.
- Don’t use too much soap! More is not better. It will lead to build-up and smells! See more on detergent below.
- A nontoxic laundry booster is helpful for preventing stains and smells, but again, don’t use too much.
- An extra rinse or two is always helpful for making sure there isn’t that build-up happening.
Drying Cloth Diapers
Then, in the morning, I start my day by throwing all of the diapers in the dryer. I let it run for just a few minutes (10-15) while I sort the rest of the family’s laundry and do any other tasks I need to do downstairs. The reason for this short pass in the dryer is to help them fluff up and not feel crispy. Soft diapers are a must for me! Then, I stop the dryer and remove anything with PUL (covers, pocket diapers, all-in-ones) and clip them to my drying rack to finish air drying. The rest of the diapers and wipes get restarted in the dryer.
Yes, you can fully dry diapers with PUL in the dryer, but you do need to be very careful not to have the dryer set to “hot.” Higher temperatures will ruin the waterproof layer. The reason I do not do this is because a) covers and pocket diapers hang dry quickly, so it never felt necessary, and b) my all-in-ones would come out of the dryer still wet, so I would end up hang drying them anyway. I found that it didn’t extend my hang drying time too much to just do it from the start, and it keeps the diapers in better condition without risking the integrity of the PUL.
The one exception to my drying routine is if I’m in a hurry. Let’s say it was a busy week and I didn’t get to washing diapers as often as I normally do. I need more diapers – and fast! In this case, I would put everything in the dryer on low and just take out things as they dry, restarting the dryer until everything is done.
Drying Diapers on a Clothesline
I do plan to add an outdoor clothesline this summer, which is how I used to dry all of my diapers. This is my preferred drying method!
Fabric Softeners and Dryer Sheets
One other thing to keep in mind is that you should never use fabric softeners or dryer sheets with cloth diapers. These will leave a buildup in the cloth that will make them lose their absorbency. Wool dryer balls are great for helping the diapers that you throw in the dryer dry quicker, but don’t load them with essential oils or anything like that right before a cloth diaper load. This could cause irritation in sensitive areas.
Restocking the Clean Diapers
At the end of the day, when I come down to start the day’s load of diapers, I grab the dried diapers and return them to the organizer in my closet. Anything that is not all the way dry yet will just keep hanging until the following day. Covers and pockets are always dry in a day. All-in-ones and fitteds usually aren’t done drying until the next day.
Washing Cloth Diapers with a Top Loader Washer
When we had a top loader with different options, I would start by running my load through a “quick wash” with just the oxygenated bleach. Then, I would start a normal wash cycle with detergent, manually opening the lid to stop the washer and let it soak for about 30 minutes. I would let the regular wash (on hot) cycle finish. Then, I would manually run one more “rinse and spin” cycle. This was a more hands-on approach, but it worked great.
Choosing the right detergent
As I mentioned above, I’ve always used my homemade laundry detergent on my cloth diapers. This is a very controversial practice in the cloth diapering world. Many will tell you that my homemade “laundry detergent” is actually “soap” vs “detergent” and that it will cause build-up on your diapers. I’ve never experienced that, but I just want to make sure that you are aware. I will say that I have also never had really “hard” or “soft” water, which can affect how laundry detergents work. My advice? If you want to make your own, go for it. The worst that will happen is that your diapers will get some build-up, you’ll have to strip them, and then switch to a different detergent.
If you aren’t interested in making or using your own homemade laundry detergent, I would recommend a toxin-free powdered detergent from Fluff Love University’s detergent index. I don’t agree with all of their choices, but it’s a good place to start looking. One warning, though, is that they often recommend too much detergent. Diaper loads are generally small loads of laundry unless you are going several days and have multiple kids in diapers. Error on the side of “less is more,” and only go up if your diapers aren’t seeming to get clean.
How to Prep Brand New Cloth Diapers
Before your new cloth diapers get their first use, they are going to need to be “prepped.” This simply means washing them a few times so that any build-up from the manufacturing process is removed. Washing also fluffs up the materials and makes them more absorbent. Most diapers come with prepping instructions, but if not, simply wash the diapers in hot water with a very small amount of laundry detergent 3 times before use. Then, keep in mind that many diaper materials will become even more absorbent over their first few uses.
Wool has its own prepping instructions that may include applying lanolin (the natural waterproof layer) to the diapers and possibly washing in a specific way that felts the material. Skipping this step will probably make you feel disappointed in the performance of your wool diapers and may leave lasting damage.
Troubleshooting issues (ammonia smell, buildup, leaks)
My cloth diapers smell even after washing them. What should I do?
If your cloth diapers still smell funky after a wash, it usually means they have detergent buildup, trapped bacteria, or minerals from hard water.
Here’s how to fix it:
- Start fresh with a strip: Strip the diapers using a specialty cloth diaper stripper (like GroVia Mighty Bubbles) or DIY with an RLR treatment. This will pull out detergent, oils, and buildup. See below for instructions.
- Check your wash routine: Make sure you’re using the right amount of detergent (too much or too little can cause issues) and doing a rinse + hot wash cycle. Cloth diapers need a heavy-duty wash, not a gentle one!
- Hard water issues? Add a water softener like Calgon if you have hard water — minerals can trap stink.
Pro tip: Diapers should come out of the washer smelling clean. If they don’t, the wash routine needs tweaking!
After my baby pees in her diaper, it smells terribly like ammonia. Why is this?
If you open a diaper and get hit with a strong ammonia smell that burns your nose 👃🔥, it’s a sign of ammonia buildup.
Ammonia happens because urine isn’t getting fully washed out of the fibers, or the diapers are sitting too long without a good rinse.
If the diaper smells as soon as your baby pees, the wetness is simply reactivating the ammonia that was already sitting there (which can also cause diaper rashes).
How to fix it:
- Do a deep clean or strip to get rid of built-up ammonia. See below.
- Adjust your wash routine: Adjust the amount of detergent you are using and make sure diapers are fully rinsed and agitated during the wash.
- More frequent washing: Try washing every 1-2 days instead of 3–4 to prevent urine from sitting too long.
- More rinses: Add an extra rinse at the end of the cycle to clear leftover detergent and residue
My diapers are leaking. How do I fix this?
Leaks can be super frustrating, but they almost always have a fix! Leaks are usually caused by fit issues, repelling, or not enough absorbency.
Here’s how to troubleshoot:
- Check the fit: The diaper should fit snugly around the legs and tummy without gaps. If it’s too loose, leaks will happen.
- Boost absorbency: Babies (especially older ones) often out-pee the inserts. Add a hemp or bamboo booster for extra absorbency.
- Check for repelling: If water beads up on the fabric instead of soaking in, you have a buildup (usually from diaper creams, detergent, or hard water). Stripping the diapers will fix this. See below.
- Consider the type: Some materials, like microfiber, can compress and leak when squeezed. Switch to natural fibers (cotton, hemp, bamboo) if needed.
- Holes in the actual diaper or delaminated PUL: I have unfortunately had several leaks due to both of these problems. In most cases, it was due to “China cheapie” diapers with manufacturing flaws. It happens more often than you might think with cheap diapers. In another case, I let my diaper cover sit on the dash of a hot car, and the PUL (the waterproof layer) delaminated. I had hoped it would be fine. It was not. This is also why you never put anything with PUL in a hot dryer!
Pro tip: If leaks happen mainly around the legs, it’s usually a fit problem. If leaks happen through the middle of the diaper, it’s usually an absorbency problem.
Stripping diapers: when and how
Smelly diapers happen, often for reasons outside of our control. If you are wondering if you need to deep-clean or “strip” your diapers, here are some tell-tale signs:
- Diapers come out of the wash still stinking, even though you are following a good wash routine
- Diapers smell terrible immediately after getting wet. Often, an ammonia smell will appear, even though your baby just peed.
- Absorbent materials repel moisture instead of absorbing it. This leads to leaks.
- Your baby is getting rashes from the diapers.
There are two methods of stripping diapers, and deciding which one to use will depend on the underlying cause of your problems.
If you are dealing with dingy diapers that smell like a barnyard or a build-up of detergent, go with the RLR method. If, however, you are dealing with ammonia build-up or bacteria issues (such as yeast), you are going to need to use the bleach method.
How to Strip Cloth Diapers Using RLR Laundry Treatment
My recommended method for stripping diapers involves using a product called RLR. It is nontoxic, bleach-free, and safe for sensitive skin. It is also produced by a small, trustworthy company in the US, so you don’t have to worry about what other chemicals they might be slipping into the product. RLR removes dried-in mineral deposits, detergent residue, and build-up of ammonia and smells. It can also whiten and brighten.
Ready to Dive into Cloth Diapering? You’ve Got This!
At first, cloth diapering may seem overwhelming, but with the right supplies and a little guidance, it becomes second nature in no time. Cloth diapering is all about finding what works best for you and your baby. It may take some trial and error, but once you get into a rhythm, it can be a simple and rewarding part of your routine. It may feel easy to stress about doing it “right” from the start, but just take it one step at a time, and give yourself grace along the way.
Save this info for later by pinning it!
Cloth Diapering FAQs
Can I cloth diaper part-time?
Absolutely! Using fewer disposable diapers is always a better option, even if it isn’t practical for you to do it full-time. Not only is it beneficial to your baby and the environment, but part-time cloth diapering can still save you a ton of money! I know quite a few moms who have done this because their daycare doesn’t allow cloth. I have also gone through stages in life where I took a break from cloth to get caught up on laundry, or used disposables at night and cloth during the day.
Will my washing machine get gross?
Not if you follow my cloth diaper washing routine! Your diapers will come out clean, and your washer will be too, I promise! As a mom of 8, I’ve found that we underestimate what a modern-day washer can do. I’ve had other messes (mud, puke, etc) where I threw the soiled stuff in the wash, unrinsed, and said a little prayer. And guess what? I’ve never gone back to leftover puke chunks or muddy water. If your washer isn’t performing well, it might be time for an upgrade!
What if my daycare won’t allow them?
See my answer above on cloth diapering part-time. This might be a great option for you.
What about diaper rash creams?
Never use regular diaper rash creams with cloth diapers. They are likely not to wash out of your diapers because they are meant to be water soluble and often contain inorganic ingredients. Instead, use a diaper rash cream that is safe for cloth diapers.
My cloth diapers are giving my baby a rash. Why is this, and how do I fix it?
If your baby is getting a rash from your cloth diapers, there could be a few issues going on. First of all, make sure that your baby has a dry, clean diaper every few hours. Disposables can be left on until they get so full they hang down to the baby’s knees (not recommended, I’ve just seen it done!), but going these long stretches with cloth is going to irritate your baby’s skin.
If exposure to moisture, even for short bits, seems to be the culprit, I recommend a fleece “liner” or stay-dry insert. These wick away moisture from the baby’s bottom while letting the urine go through and still be absorbed. I always use some sort of “stay-dry” material for the first few months.
Other causes of cloth diaper rashes are generally wash routine problems. Bacteria or ammonia left in the diaper will cause rashes. Detergent that isn’t fully rinsed out can also cause rashes. See above for how to strip diapers, and then make sure you are following a solid washing routine.
Did this post inspire you?
Please share and tag us @thefromscratchfarmhouse on Instagram so we can see how this post inspired or encouraged you in your own home or homestead! You can also leave a comment below!
For more simple living ideas, you may enjoy these posts:
How to Homeschool and Work From Home
Homemade Essential Oil Bug Spray Repellent Recipe