This post may contain affiliate links. Please read our affiliate disclosure.
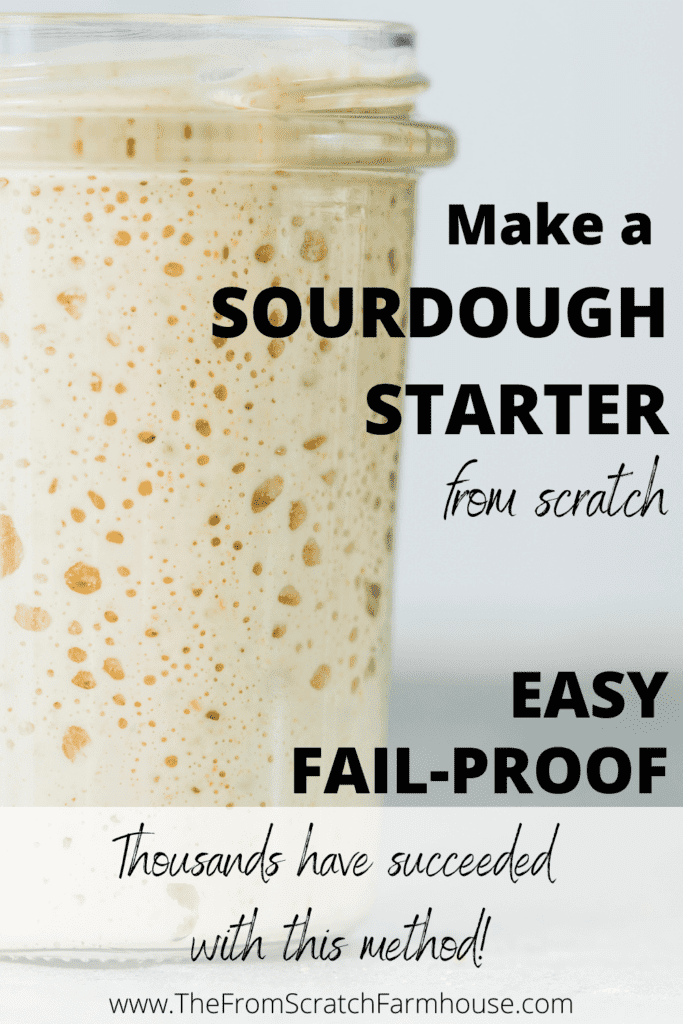
This is the easiest method out there for learning how to make a sourdough starter from scratch. No discarding, No weighing, No failures, Zero stress. You will be making sourdough bread, desserts, and more in no time!
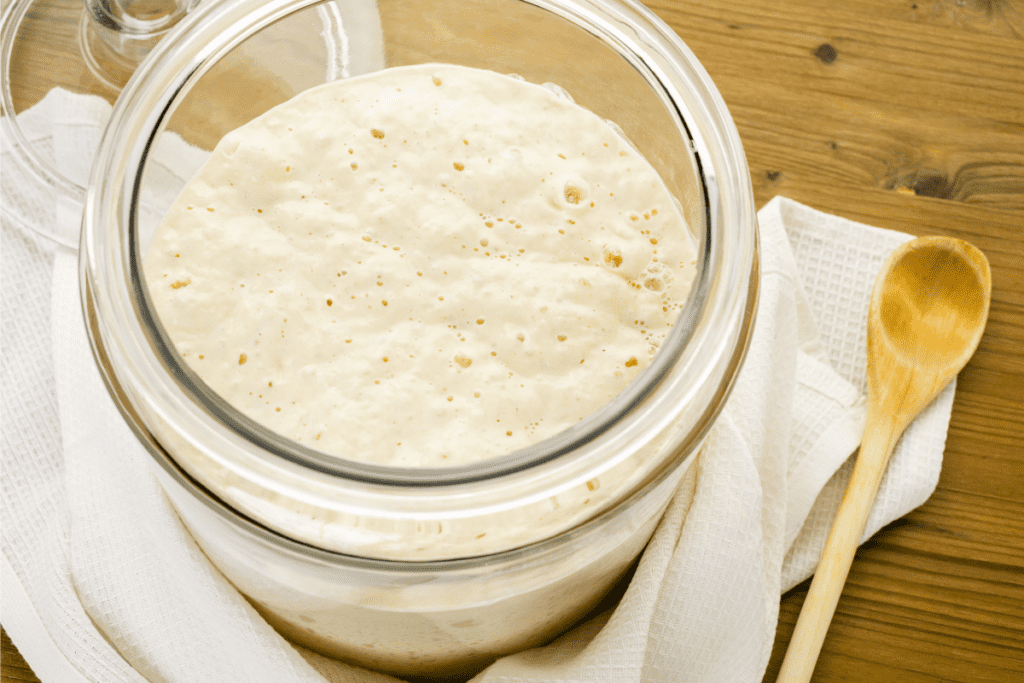
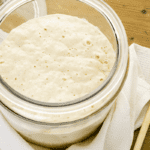
Baking with sourdough is something that has interested me for quite some time. In fact, several years ago, I learned how to create a sourdough starter from scratch and dove right in. It went great! My starter bubbled, smelled wonderful, and eventually, it baked up a gorgeous loaf of bread.
There was but one small problem. My family thought it was gross! They complained that it was too “sour” and asked me to please go back to making regular bread. I was hurt and deflated. All of my hard work had been in vain! I tossed the starter in the garbage and vowed never to try that again.
Not long after that experience, I stumbled upon some facts about sourdough that blew my mind. The most surprising fact was that sourdough can have a very wide range of tastes! It turns out that there are many factors that affect the taste of sourdough baked goods, and by doing certain things and feeding it a certain way you can either make the taste more or less sour. Who knew?!
Then, when I got serious about reducing our dependence on the grocery store I knew I had to give sourdough another go.
I had one more hesitation though. In the midst of a busy stage of life, I knew I didn’t have the time to be measuring out ingredients or the mental space for anything complicated. As shown in the video below, I decided to experiment with simplifying the process.
My results were amazing! Without discarding or weighing ingredients I had a bubbly active starter in no time. Best of all, that starter would go on to make many loaves of wonderful bread.
I’ve since been teaching this method to many others and have seen how consistently it works!
Supplies You Will Need:
Easy steps for making a sourdough starter:
Step 1:
Into your glass jar add 3/8 cup flour, using the coffee scoop, and 1/4 cup of water, using a liquid measuring cup.
Step 2
Stir thoroughly with a spatula or spoon until no lumps remain. The consistency should be like a thick pancake batter and will thin out a bit with time.
If it is thick like sticky dough, add a few drop more of water and stir. Do this until you reach a thick pancake batter consistency.
Step 3:
Place something on top of your jar that will allow for airflow, but won’t let bugs in. I have used everything from cheesecloth with a rubber band to a napkin tied with twine, to a specially made jar cover.
Step 4:
Place your starter in a warm place on your counter where you will remember to feed it. The temperature should be at least 70 degrees F in this location, but not over 80. If your kitchen is colder than this, then on top of a fridge or freezer, or in a room with a wood stove might be a better location. If your kitchen is hotter than 80 degrees F than you may have to feed your starter more often than twice per day when you are getting it started. Don’t worry, it will only need this daily attention for the first month!
Step 5:
In the evening, or about 12 hours after starting your starter, feed it in the exact same way: ⅜ cup of flour and ¼ cup of water. Stir well and cover.
Step 6:
Continue feeding it each morning and evening for 4 more days in the exact same way.
Step 7:
Step On day 6, your starter should be lively and bubbly and ready for an easy recipe, such as a batter bread, but not quite ready to rise a regular loaf of bread. You can also use what is often referred to as the “discard,” in a recipe for something such as brownies, biscuits, or pancakes.
Notes: ”discard” is simply the starter you are going to remove from the starter container, and either use or give to your well-fed chickens. Discarding IS necessary unless you want to end up with a 5-gallon bucket of starter and spend a small fortune on flour. This is because when feeding your starter, the ratios of starter, to flour, to water need to remain around the same.
Also, don’t be worried if you have only seen a few bubbles at this point. Make sure you are using unchlorinated water and organic flour (not mandatory, but will eliminate the possibility of pesticides or herbicides in the flour that may kill the natural yeast and it will also ensure that it is unbleached).
Step 8:
On day 6, start by pouring your entire starter into your batter bowl. Take this opportunity to wash your container.
Step 9:
Remove ½ cup of the starter, and put it back in the bowl or jar where it lives.
Step 10:
Feed your starter its regular feeding and place it back in its warm place on your counter, making sure to cover the top.
Step 11:
The activated batter or discard that you have removed is then ready for use in your discard recipe.
Step 12:
You will continue this process for about 4 weeks, cleaning out your jar and using the discard every 6-7 days (or before it bubbles over if it is very active!). Don’t forget to save 1/2 cup to keep your starter going!
Step 13:
After a few weeks, you should be able to make your first loaf of sourdough bread! You will know when it is ready for bread making when it starts to consistently double in height after a feeding. At this point, you will do the EXACT same process, just using the discarded starter in your bread recipe instead of a “discard” recipe.
Simplify Caring For Your Sourdough Starter
Do I have to feed my sourdough starter every day?
The really exciting part about getting your sourdough starter active and established is that it is now able to be kept in the refrigerator when not being used. Simply feed it like normal and then refrigerate. Take it out and feed it 24 hours before you want to use it. I like to take mine out at night, feed it, feed it the next morning, and then start my recipe that evening or the next morning. Once you have used your starter, feed it and place it back in the fridge until next time. This means if you are baking once per week, you are only feeding it 3 – 4 times each week instead of twice each day.
How can I go on vacation or take a break from my sourdough starter?
This is no problem after your starter is established!
Simply feed your active starter and then place it in the refrigerator. You can keep your starter in the fridge for 3 weeks (4 max, but it will take longer to get it going again) without feeding it.
If you plan to be gone for more than 4 weeks you should plan on dehydrating it for long-term storage.
My recipe calls for more sourdough starter than I have. How do I make more?
You just need to “bulk it up” by adding flour and water in the same proportions that you feed it. The easiest way to do this is just to give it multiple feedings of 3/8 cup flour and 1/4 cup water until you have enough starter for your recipe. If you would prefer, you can also use a scale to add equal amounts in weight of flour and water.
How long does it take until a sourdough starter can make bread?
It may take as much as a month to get a robust enough starter to be able to rise bread. Don’t give up too early!
How can I tell when my sourdough starter is ready to make bread?
The test to see if it is active enough to rise bread is to watch it after feeding. If your starter is bubbly and doubling in size within 8 hours of feeding, it is ready to go!
Is the sourdough float test accurate?
The popular test of placing some sourdough starter in water to see if it floats is not an accurate way to determine if it is active enough to make bread. First of all, all this test shows is that the dough contains air bubbles. This can happen off and on in the process of establishing the starter and may provide a false “positive” result.
What should sourdough starter smell like?
Your starter should smell sweet and yeasty after a few weeks. However, it should not smell rotten or unpleasant. If it smells like vinegar, it’s begging to be fed.
When people complain of unpleasant smells coming from their starter, I suggest one two things:
- If your starter is under two weeks old, just keep going. It is likely in its ugly teenage stage and will smell better in time as it matures (and more scientifically, as the good yeast outnumber the bad bacteria).
- If your starter is more established and smells off, try removing just 1/4 cup to a clean jar to give it a fresh start. Feed your starter like normal, repeating this process of cutting back to 1/4 cup, adding it to a new jar, and feeding every day for 4 days. Also, make sure the location is between 70 and 80 degrees Fahrenheit. This should solve the problem!
What is the dark liquid on top of my sourdough starter?
A dark liquid that forms on top of sourdough starter is naturally-occurring alcohol known as hooch. It is completely normal, but it can be an indication that you are not feeding your starter often enough. You should pour off the hooch and discard it before stirring your starter. You can then feed like normal.
This most often happens if you have had your starter in too warm of a room, or if you have left it in the fridge for too long between feedings.
Make a Sourdough Starter From Scratch {Easiest Method!}
Materials
- 1/2 gallon glass jar
- ⅛ cup coffee scoop
- Liquid measuring cup
- A silicone spatula
- Something breathable to cover your jar.
- Flour of your choice; organic unbleached all-purpose white wheat flour is recommended; an heirloom grain option is Kamut All-purpose white flour which I purchased from The Food Nanny.
- Pure unchlorinated water. I am using my tested well-water, but if you live in the city where chlorine is added, you can just leave your water sitting out overnight on the counter and the chlorine will evaporate. Another option of course is to purchase purified water from the store.
Instructions
- Into your glass jar add 3/8 cup flour, using the coffee scoop, and 1/4 cup of water, using a liquid measuring cup.
- Stir thoroughly with a spatula or spoon until no lumps remain. The consistency should be like a thick pancake batter and will thin out a bit with time.
- If it is thick like sticky dough, add a few drop more of water and stir. Do this until you reach a thick pancake batter consistency.
- Place something on top of your jar that will allow for airflow, but won't let bugs in. I have used everything from cheesecloth with a rubber band to a napkin tied with twine, to a specially made jar cover.
- Place your starter in a warm place on your counter where you will remember to feed it. The temperature should be at least 70 degrees F in this location, but not over 80. If your kitchen is colder than this, then on top of a fridge or freezer, or in a room with a wood stove might be a better location. If your kitchen is hotter than 80 degrees F than you may have to feed your starter more often than twice per day when you are getting it started. Don't worry, it will only need this daily attention for the first month!
- In the evening, or about 12 hours after starting your starter, feed it in the exact same way: ⅜ cup of flour and ¼ cup of water. Stir well and cover.
- Continue feeding it each morning and evening for 4 more days in the exact same way.
- Step On day 6, your starter should be lively and bubbly and ready for an easy recipe, such as a batter bread, but not quite ready to rise a regular loaf of bread. You can also use what is often referred to as the “discard,” in a recipe for something such as brownies, biscuits, or pancakes.
- On day 6, start by pouring your entire starter into your batter bowl. Take this opportunity to wash your container.
- Remove ½ cup of the starter, and put it back in the bowl or jar where it lives.
- Feed your starter its regular feeding and place it back in its warm place on your counter, making sure to cover the top.
- The activated batter or discard that you have removed is then ready for use in your discard recipe.
- You will continue this process for about 4 weeks, cleaning out your jar and using the discard every 6-7 days (or before it bubbles over if it is very active!). Don't forget to save 1/2 cup to keep your starter going!
Notes
- ”discard” is simply the starter you are going to remove from the starter container, and either use or give to your well-fed chickens. Discarding IS necessary unless you want to end up with a 5-gallon bucket of starter and spend a small fortune on flour. This is because when feeding your starter, the ratios of starter, to flour, to water need to remain around the same
- Also, don't be worried if you have only seen a few bubbles at this point. Make sure you are using unchlorinated water and organic flour (not mandatory, but will eliminate the possibility of pesticides or herbicides in the flour that may kill the natural yeast and it will also ensure that it is unbleached).
Want to watch me make a sourdough starter from scratch?
Updates since making this video: I no longer recommend the bowl and wet rag method! It works just fine, but I have found it an unnecessary expense and wasted effort. Go with the 1/2 gallon jar with any sort of cloth you can secure to the top to keep bugs out and let some airflow in. A cracked lid works too, but it may let fruit flies in.
Want to print the instructions?
A few favorite cookbooks of mine with sourdough recipes:
The method I used to create the starter is based on the method by MaryJane Butters in her book Wild Bread: Sourdough Reinvented. This book is packed full of everything you would want to know on the topic of sourdough! She has a ton of beginner-friendly and advanced recipes in there as well.
A brand-new favorite of mine is by Jill Winger and it is called The Prairie Homestead Cookbook. I like that this book contains quite a few ideas for using the discard that doesn’t involve bread!
Alright, that should get you well on your way to becoming a sourdough baking master! Happy Baking!
Do you need sugar for the starter?
Nope, no sugar is needed.
Do you only have to discard once every 6-7 days when you clean the jar?
You never “have” to discard unless the starter will overflow if you feed it.
Do you have a favorite bread, boule, recipe?
Thank you for trying out the Homemade Dishwasher Detergent Tablets recipe! I understand how frustrating it can be to deal with a white residue on your dishes. Here are a few suggestions that might help:
Check Water Hardness: Sometimes, hard water can cause a white residue. If you suspect hard water, try adding 1-2 tablespoons of citric acid to the detergent mix. Citric acid helps to combat hard water minerals.
Rinse Aid: Using a rinse aid can help prevent white residue. You can use white vinegar as a natural rinse aid. Simply fill your dishwasher’s rinse aid dispenser with vinegar.
Baking Soda: Adding a small amount of baking soda (about 1-2 tablespoons) to each load can help reduce residue. It helps to balance the pH and improve cleaning efficiency.
Proper Loading: Ensure that your dishwasher is not overloaded and that the spray arms can move freely. Proper water circulation is essential for effective cleaning.
Detergent Amount: Sometimes, using too much detergent can leave residue. Try reducing the amount of detergent tablets you use per load.
If you continue to experience issues, consider adjusting the recipe slightly to suit your water conditions. I hope these tips help, and please let me know if you have any other questions or concerns!
Where can we find the products you use in your video? I really like those used for the Kamut Starter.
Thanks! I’m glad you liked them! Most of the products I use can be found online or at local stores that carry kitchen supplies. For the Kamut starter, you’ll need things like a glass jar, a breathable cloth or cover, and a rubber band to hold it in place. If you’re looking for specifics, I can share some links to similar items! Just let me know.
Hi, I’m using this method to make the sourdough starter. It is working very well and love this method. I do have a question. I am coming up on 4 weeks, after that I assume that it goes into the maintenance period. Do I continue to feed it twice a day or can I cut down the feeding to once or twice a week depending on how often I bake? I keep discard in the fridge and use that to bake with and change it every week. (I’ve made biscuits and cookies so far). Yumm
Thank you for your help.
I’m so happy to hear that! Yes, you continue to feed it twice each day unless it is in the fridge. If it lives in the fridge, you only need to feed it about 12 hours before you are ready to bake to “wake it up.” Hope that helps!